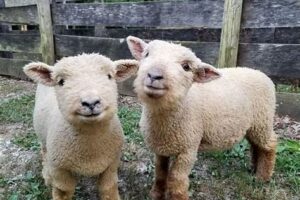
Learn how to make adorable farm animals from clay with our easy-to-follow tutorial. Perfect for kids and adults alike!
Learning how to make farm animals from clay is a fun and creative way to express your love for animals and nature. If you’re looking for a new hobby or a way to improve your sculpting skills, then this is the perfect project for you. With just a few simple materials and some basic techniques, you can create lifelike farm animals that will delight both children and adults.
Firstly, start by selecting the type of animal you want to create. Whether it’s a cow, pig, chicken, or sheep, you can find plenty of inspiration from pictures or a trip to a nearby farm. Next, gather all the necessary materials such as clay, sculpting tools, and a work surface. Once you have everything ready, begin molding the clay into the desired shape using your hands or tools. Don’t be afraid to experiment with textures and details to add more depth and personality to your animal.
As you work on your sculpture, remember to take breaks and step back to assess your progress. This will help you identify any areas that need improvement and make adjustments accordingly. Additionally, don’t forget to add finishing touches like eyes, ears, and other features that will bring your animal to life. Finally, let your creation dry completely before displaying it proudly on a shelf or gifting it to a friend or family member.
In conclusion, making farm animals from clay is a satisfying and enjoyable process that anyone can try. With a bit of imagination and practice, you can create beautiful and unique sculptures that capture the essence of these beloved creatures. So, why not give it a go and see where your creativity takes you?
Clay is a versatile material that can be used to create various objects, including farm animals. Making farm animals from clay is an enjoyable and satisfying activity that can be done by people of all ages. With a little patience and creativity, you can create lifelike models of your favorite farm animals. In this article, we will provide you with step-by-step instructions on how to make farm animals from clay.
Materials Needed
Before we start creating our farm animals, we need to gather the necessary materials. You will need:
- Modeling clay in different colors
- A modeling tool or a toothpick
- A cutting tool or a knife
- A work surface or a mat
- A rolling pin or a cylindrical object like a bottle
Choosing the Farm Animal
The first step in making farm animals from clay is choosing the animal you want to create. You can choose any farm animal you like, such as a cow, pig, sheep, or horse. Look for pictures of the animal you want to create to get an idea of its shape and features.
Making the Body
Start by taking a ball of clay and rolling it into a cylinder shape. This will be the body of your animal. Use your fingers to shape the body into the desired shape, making sure it is proportional to the animal’s head and legs.
Making the Head
To make the head of your animal, take a smaller ball of clay and shape it into a sphere. Use your modeling tool or toothpick to create the features of the face, such as the eyes, nose, and mouth. Attach the head to the body by pressing it gently onto the top of the body.
Making the Legs
Roll out four thin cylinders of clay for the legs. Make sure they are all the same length and thickness. Attach the legs to the body by pressing them gently onto the sides of the body. Use your modeling tool to create the hooves or feet of the animal.
Making the Tail
Depending on the animal you are creating, you may need to add a tail. Roll out a thin cylinder of clay and attach it to the back of the animal’s body. Use your modeling tool to shape the tail into the desired form.
Adding Details
Now that you have the basic shape of your farm animal, it’s time to add some details. Use your modeling tool to create fur, feathers, or any other texture on the animal’s body. You can also use different colors of clay to create spots, stripes, or other markings on the animal.
Baking the Clay
Once you are satisfied with your creation, it’s time to bake the clay. Follow the instructions on the package of your modeling clay to determine the baking temperature and time. Place the animal on a baking sheet and bake it in the oven according to the instructions.
Painting the Animal
After the clay has cooled down, you can paint your animal with acrylic paints to give it a more realistic look. Use a small brush to paint the details of the animal, such as the eyes, nose, and hooves. Let the paint dry completely before handling your animal.
Displaying Your Creation
Congratulations! You have successfully made a farm animal from clay. You can display your creation on a shelf, in a glass case, or use it as a decoration for your garden. Making farm animals from clay is an enjoyable and rewarding activity that allows you to express your creativity and imagination.
Conclusion
Making farm animals from clay is an easy and fun activity that can be done by anyone. With a little practice and patience, you can create lifelike models of your favorite farm animals. Follow the instructions in this article, and you will be able to make your own farm animal in no time.
Creating farm animals from clay can be a fun and rewarding project for both adults and children. Not only does it allow you to flex your creative muscles, but it also provides an opportunity to learn more about the animals we share our planet with. Here’s a step-by-step guide on how to make farm animals from clay:
1. Gather Your Materials: Before starting your clay farm animals project, you’ll need to gather all the necessary materials. This includes clay, sculpting tools, paint (if desired), and a workspace that can get messy.
2. Choose Your Farm Animal: There are countless animals to choose from in the farming world, so pick your favorite and get familiar with their physical features. Knowing what the animal looks like will help you create a more realistic model.
3. Research Your Animal: Once you’ve picked your animal, it’s time to do some research. Find images of the animal from different angles and take note of any distinct features or markings.
4. Plan Your Sculpture: Sketch out the shape and proportions of your animal on paper before starting with clay. This will help you create a more accurate and aesthetically pleasing sculpture.
5. Start With A Base: Begin by creating the base of your animal from clay, using your research and sketch as a guide. This is the foundation of your sculpture and will determine the overall size and shape.
6. Add Details: Once your base is complete, start adding details such as the head, legs, tail, and any other distinct features. Use different sculpting tools to manipulate the clay and add texture.
7. Let Dry: After completing your sculpting, allow the clay to dry completely before attempting to paint or handle the model. Depending on the size of your animal, this may take a few hours or even a few days.
8. Paint Your Animal: Once dry, you can now paint your clay farm animal. Use colors that match your research and reference images, and don’t be afraid to add some artistic flair.
9. Display Your Creation: Your clay farm animal is now complete and ready to be displayed! Find a suitable spot in your home or garden to show off your newfound sculpting skills.
10. Experiment And Have Fun: Don’t be afraid to experiment with different techniques and styles when creating your clay farm animals. And most importantly, have fun! Sculpting can be therapeutic and rewarding, so enjoy the process.
In conclusion, making farm animals from clay is a great way to exercise your creativity while also learning more about the animals we share our world with. By following these steps and allowing yourself to experiment and have fun, you can create beautiful and realistic sculptures that are sure to impress. So go ahead and gather your materials, choose your favorite farm animal, and get started on your clay sculpting journey today!
Have you ever wanted to make your own farm animals from clay? It’s a fun and creative project that can be enjoyed by all ages. Here’s how to get started:
- Gather your materials. You will need clay, sculpting tools, and a surface to work on.
- Choose which animal you want to make. Some popular farm animals include cows, pigs, chickens, and horses.
- Start with the basic shape of your animal. Use your hands to mold the clay into the rough shape of your animal.
- Add details. Once you have the basic shape, start adding details like eyes, ears, and a tail. Use your sculpting tools to help create these features.
- Texture. Give your animal some texture by using your sculpting tools to create fur or feathers. This will add depth and realism to your creation.
- Bake. Once you’re happy with your creation, it’s time to bake it in the oven according to the instructions on your clay package. This will harden your creation and make it durable.
- Paint. After baking, paint your animal with acrylic paints to add color and personality. Be creative and have fun!
Making farm animals from clay is a great way to unleash your creativity and make something unique. It’s also a great activity to do with kids, as they can learn about different animals while having fun creating something with their hands. So why not give it a try?
Thank you for taking the time to read this article on how to make farm animals from clay. I hope you found the information helpful and inspiring. Whether you’re a beginner or an experienced artist, creating clay animals is a fun and rewarding activity that allows you to express your creativity and connect with nature.
If you’re new to clay modeling, I encourage you to start with simple animal shapes such as pigs, cows, and chickens. These animals have basic shapes that are easy to mold and require minimal detailing. As you gain confidence and experience, you can move on to more complex animals such as horses, goats, and sheep.
In addition to being a fun activity, making clay animals can also be a great way to teach children about farm life and animal behavior. By creating their own farm animals, children can learn about the different types of animals found on farms and the roles they play in food production. They can also develop an appreciation for the hard work and dedication required to care for farm animals.
Overall, making farm animals from clay is a wonderful way to explore your creativity and connect with nature. So grab some clay, get your hands dirty, and see what kind of wonderful animals you can create!
.
As an AI language model, I don’t have a voice or tone. However, I can provide you with the answers to some common questions people ask about how to make farm animals from clay. Here are some of them:
1. What materials do I need to make farm animals from clay?
- Clay (air-dry or oven-bake)
- Sculpting tools (e.g., wire, rubber-tipped tools, toothpicks)
- Paints or markers for detailing
- Clear varnish or glaze to protect the finished product
2. How do I start making a farm animal from clay?
- Choose the animal you want to make and gather reference images.
- Start with a basic shape, such as a ball or cylinder, and add details gradually.
- Use your sculpting tools to carve out features like eyes, ears, and hooves.
- Allow the clay to dry completely before painting it.
- Apply a clear varnish or glaze to protect the finished product.
3. What types of clay can I use to make farm animals?
- Air-dry clay is a popular choice because it’s easy to work with and doesn’t require baking.
- Oven-bake clay is another option that produces a more durable finished product.
- Polymer clay is also a good choice because it’s versatile and comes in many colors.
4. Can I make realistic-looking farm animals from clay?
- Yes, with practice and attention to detail, you can create farm animals that look very realistic.
- Study the anatomy and proportions of the animal you want to make, and pay close attention to details like fur texture and eye shape.
- Experiment with different tools and techniques to achieve the look you want.
5. How long does it take to make a farm animal from clay?
- The time it takes to make a farm animal from clay depends on the size and complexity of the project.
- A simple animal like a chicken or pig may only take a few hours, while a more complex animal like a horse or cow may take several days.
- Allow plenty of time for the clay to dry before painting or glazing.

