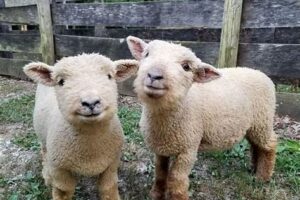
Learn how to create adorable farm animals using clay with our step-by-step guide. Perfect for art enthusiasts and animal lovers alike!
Are you looking for a fun and creative way to spend your spare time? Why not try making farm animals using clay! Not only is it an enjoyable activity, but it also provides an opportunity to unleash your inner artist and explore your imagination. In this guide, we will take you through the step-by-step process of creating lifelike farm animals using clay. Whether you’re a beginner or an experienced sculptor, this tutorial will provide you with all the necessary steps to create stunning and realistic farm animals that will impress your family and friends.

Get ready to unleash your creativity with clay sculpting! Whether you’re an experienced sculptor or a beginner, making farm animals with clay can be a fun and therapeutic activity. Before you start, choose the type of clay you want to use – air-dry or oven-bake. Each has its own characteristics and requirements, so choose wisely. Once you’ve selected your clay, gather reference materials for the animal you want to sculpt. This will help guide you as you work.
Creating a basic armature out of wire or aluminum foil can give your clay animal structure and stability. This is especially important for larger or more complex sculptures. Begin by forming the general shape of your animal with clay, using your reference images as a guide. Don’t worry about getting every detail perfect at this stage.
As you progress, start adding more details like muscles, fur, or feathers. This is where you can really bring your animal to life. Use clay modeling tools to add finer details like eyes, nostrils, and other facial features. These tools can help you achieve more precise lines and textures. Before letting your sculpture dry or bake, take time to smooth out any rough or uneven surfaces. This will give your animal a more polished look and feel.
Once your sculpture is dry or baked, it’s time to add the finishing touches. Use paint or other materials to bring out the colors and textures of your animal. Congratulations, your sculpture is finished! Display your work proudly on a shelf or stand, and share it with your friends and family. Consider making more farm animals to expand your collection and continue exploring your creativity with clay sculpting.
Are you looking for a fun and creative way to make farm animals? Clay is the perfect material to use! Not only is it easy to work with, but it also allows you to create intricate details that can bring your animals to life. Here’s how to make farm animals using clay:
Materials:
- Clay (either air-dry or oven-bake)
- Sculpting tools
- Paint (optional)
Steps:
- Start by choosing which farm animal you want to make. Some popular options include cows, horses, pigs, and chickens.
- Take a small amount of clay and begin sculpting the basic shape of your animal. For example, if you’re making a cow, you might start by forming a rounded body and four legs.
- Use your sculpting tools to add details such as eyes, ears, and a tail. Don’t forget to add texture to the fur or feathers!
- If you’re using oven-bake clay, follow the instructions on the package to bake your animal. If you’re using air-dry clay, let it dry completely before moving on.
- If desired, paint your animal using acrylic paints. This can add extra depth and dimension to your creation.
When making farm animals using clay, the possibilities are endless. You can create a whole barnyard full of animals, each with their own unique personality. So get creative and have fun!
Greetings to all the creative minds out there! Thank you for taking the time to read my blog on how to make farm animals using clay. I hope this article has inspired you to create your own miniature farm animals, using your creativity and imagination.
As you may have noticed, making farm animals using clay requires patience and attention to detail. It is not only a fun activity that can keep you busy for hours, but it also allows you to express yourself through art. Clay modeling is an excellent way to unleash your inner artist, and the best part is that you don’t need any prior experience in art to get started.
Creating your farm animals using clay is a fantastic way to unwind, de-stress and escape from the daily hustle-bustle of life. It is also an excellent activity to do with your friends and family, as it allows you to bond over a fun and creative activity. Not to mention, the end result of your hard work will be a beautiful set of handcrafted farm animals that you can proudly display in your home or give as gifts to your loved ones.
In conclusion, whether you are a beginner or an expert in clay modeling, making farm animals using clay is a fun and rewarding activity. So, what are you waiting for? Grab some clay and start molding your very own farm animals today. Trust me; you won’t regret it!
.
People also ask about how to make farm animals using clay:
- What materials do I need?
- How do I shape the clay into animal figures?
- What techniques can I use to add details and texture?
- How do I bake and finish the clay animals?
Answer:
- To make farm animals using clay, you will need air-dry clay, sculpting tools, acrylic paints, and a paintbrush.
- To shape the clay into animal figures, start by creating a basic body shape for your chosen animal. Then, add details such as ears, snouts, tails, and legs. You can use your sculpting tools to carve out features or add textures to the clay.
- Some techniques you can use to add details and texture include carving lines for fur, using a toothbrush to create a rough texture, or pressing a textured surface onto the clay to imprint a pattern.
- Once you are happy with your clay animals, allow them to dry completely according to the manufacturer’s instructions. Then, paint them with acrylic paints and a paintbrush. You can add extra details such as spots, stripes, or eyes. Finally, let the paint dry and apply a coat of varnish to protect your finished creation.
Remember to have fun and experiment with different techniques to create unique and adorable clay farm animals!

