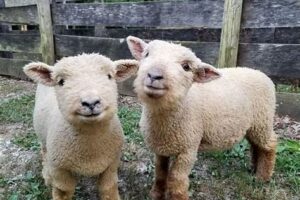
Learn how to make farm animals for your school project! Follow these easy steps and create adorable models of cows, pigs, and more.
If you’re looking for a fun and educational way to teach children about farm animals, making them for a school project is a great idea. Not only will it help students learn about the different types of animals found on a farm, but it can also be a fun and creative activity for them to enjoy. Whether you’re a teacher or a parent, this project can provide hours of entertainment while also teaching valuable lessons about agriculture and animal husbandry. So, roll up your sleeves, get out your supplies, and let’s get started on creating some adorable farm animals!
When it comes to school projects, one of the most fun and educational activities is making farm animals. However, it can be challenging to know where to start or how to make them look realistic. In this article, we will guide you through the steps of how to make farm animals for school projects that are both easy to create and visually appealing.
Cow
A cow is a classic animal to include in a farm project. To make a cow, you will need:
- Black and white construction paper
- Scissors
- Glue
First, cut out a large oval shape from the white construction paper for the body of the cow. Then, cut out four small circles for the legs and two larger circles for the cow’s head. Cut out smaller circles from the black construction paper to use as the cow’s spots. Glue the spots onto the cow’s body and attach the legs and head with glue as well. Finish by drawing on the cow’s face with a black marker.
Pig
A pig is another great addition to any farm project. For this, you will need:
- Pink construction paper
- Scissors
- Glue
- Black marker
Start by cutting out two large ovals from the pink construction paper for the pig’s body. Cut out four small circles for the legs and two smaller ovals for the pig’s ears. Glue the legs onto the body and attach the ears to the top of the head. Draw on the pig’s eyes, nose, and mouth with a black marker.
Chicken
A chicken is another farm animal that is easy to make. To create a chicken, you will need:
- Yellow construction paper
- Orange construction paper
- Scissors
- Glue
- Black marker
First, cut out a large circle from the yellow construction paper for the chicken’s body. Cut out two small circles for the eyes and a triangle for the beak from the orange construction paper. Glue the eyes and beak onto the chicken’s face and draw on its pupils with a black marker. Finally, cut out two wings from the yellow construction paper and attach them to the chicken’s body.
Horse
A horse is a more challenging animal to make, but it can still be done easily with some materials. To make a horse, you will need:
- Brown construction paper
- Black construction paper
- Scissors
- Glue
Begin by cutting out a large oval shape from the brown construction paper for the horse’s body. Cut out four small circles for the legs and two larger circles for the horse’s head. Cut out smaller circles from the black construction paper to use as the horse’s eyes and nostrils. Glue the spots onto the horse’s body and attach the legs and head with glue as well. Finish by drawing on the horse’s mane and tail with a black marker.
Sheep
A sheep is another farm animal that is simple to make. To create a sheep, you will need:
- White construction paper
- Black construction paper
- Scissors
- Glue
Cut out a large oval shape from the white construction paper for the sheep’s body. Cut out four small circles for the legs and two smaller ovals for the sheep’s ears. Cut out smaller circles from the black construction paper to use as the sheep’s eyes and nose. Glue the spots onto the sheep’s body and attach the legs and ears with glue as well. Finish by drawing on the sheep’s mouth with a black marker.
Conclusion
Creating farm animals for school projects can be a fun and educational activity. By following these simple steps, you can make realistic and visually appealing farm animals that will impress your classmates and teachers. Remember to use materials such as construction paper, scissors, glue, and markers to bring your animals to life. Have fun and let your creativity shine!
Making farm animals for a school project can be a fun and creative way to learn about different animals. Before you start, the first step is to pick an animal that suits your resources and materials. Consider what supplies you have access to and which animal would work best with them. Once you have selected your animal, it’s time to gather your materials. Depending on the animal you choose, you may need construction paper, pipe cleaners, cotton balls, and googly eyes. Make a list of everything you need and gather them before starting.After gathering your materials, the next step is to sketch your design. A visual plan will help you avoid mistakes and ensure that your final product turns out the way you want it. Once you have your design, start cutting out the necessary shapes and assembling your animal. Follow your plan while being creative along the way.To add a realistic touch to your animal, consider adding some texture. This could be done with cotton balls, feathers, or even dried beans. Once you have your animal assembled, it’s time to give it some color. Use paint, markers, or other decorating materials to add personality to your creation. Don’t forget the details! Small touches like a tail, mane, or spots can make all the difference in bringing your animal to life.To really set the scene, consider creating a small habitat for your animal. This could be a small barn, a grassy field, or even just a simple backdrop. Finally, if you will be presenting your project, practice in front of a mirror or with friends to perfect your delivery. This will help you feel more confident when it’s time to show off your work.Remember, this project is supposed to be fun! Take your time, be creative, and enjoy the process of bringing your farm animal to life. Making farm animals for a school project is a great way to learn about different animals while also exercising your creativity. By following these steps, you can create a unique and impressive project that will stand out in the classroom.
As a student, one of the most exciting and challenging tasks is to create a school project. If you are assigned to make a farm animal model, you might be wondering how to make it creative and unique. Well, don’t worry; we’ve got you covered! Here are some tips and tricks on how to make farm animals for a school project.
Materials Needed:
- Cardboard
- Scissors
- Glue
- Paints
- Brushes
- Markers
- Ruler
- Pencil
Step-by-Step Guide:
Step 1: Choose your Farm Animal:
The first step in making a farm animal model is to choose which animal you want to create. You can choose from a variety of farm animals such as a cow, pig, sheep, or horse.
Step 2: Draw the Outline:
Using a pencil and ruler, draw the outline of your chosen farm animal on the cardboard. Make sure that you draw it in a way that it will stand up on its own.
Step 3: Cut Out the Shape:
Carefully cut out the shape of your farm animal using scissors. Be sure to cut along the lines that you drew on the cardboard.
Step 4: Paint Your Farm Animal:
Using paints and brushes, paint your farm animal in the colors that match its real-life counterpart. For example, if you are making a cow, you might want to paint it black and white.
Step 5: Add Details:
Once the paint has dried, you can add details to your farm animal using markers. You can draw eyes, noses, and mouths, or any other details that will make it look more realistic.
Step 6: Add Texture:
If you want to make your farm animal even more realistic, you can add texture by using items such as cotton balls for sheep’s wool or feathers for a chicken.
Step 7: Display Your Farm Animal:
Finally, display your farm animal model for everyone to see. You can use it as a decoration in your classroom or home, or you can even use it as a prop in a school play.
Conclusion:
Making farm animals for a school project is not only fun but also educational. It allows students to learn about different farm animals and their characteristics. By following these simple steps, you can create a unique and creative farm animal model that will surely impress your classmates and teachers.
Dear fellow crafters and animal lovers,I hope you found this guide on How To Make Farm Animals For School Project both informative and entertaining. Creating these adorable animals is a fun and engaging way to teach children about the importance of farming and agriculture. Not to mention, it’s a great way to unleash your creativity and indulge in some hands-on crafting.As you embark on your farm animal project, remember to stay patient and enjoy the process. Crafting is not only about the end result, but also about the journey of creating something from scratch. Take your time and make sure to pay attention to the details – every little touch can bring your animal to life.Additionally, don’t be afraid to personalize your animals with unique features and quirks. Maybe your pig has a curly tail or your cow has a sparkle in its eye. Adding these small touches can make your project stand out and show off your individual style.Finally, remember that this project is not just about creating cute farm animals for display – it’s also about teaching children important lessons about the environment, animal welfare, and food production. Use this opportunity to have meaningful conversations with your children or students about the role of farmers in our society and the importance of treating animals with kindness and respect.Thank you for joining me on this crafting adventure. I can’t wait to see your finished projects and hear about your experiences. Happy crafting!Best,[Your Name].
When it comes to making farm animals for school projects, there are many people who have questions about how to do it. Here are some of the most common people also ask questions about making farm animals for school projects, along with creative answers:
1. What materials can I use to make farm animals for a school project?
- You can use a variety of materials to make farm animals for a school project, such as paper mache, clay, felt, or even recycled materials like cardboard or egg cartons.
- For a more realistic look, you can use materials like fur, feathers, or beads to add texture and dimension to your animal.
2. How can I make my farm animal look realistic?
- To make your farm animal look realistic, you can study pictures or videos of real animals to get an idea of their proportions, coloring, and features.
- Try to recreate these details in your own project, such as using different shades of brown to show the varying fur tones on a cow.
3. What kind of farm animal should I make?
- The type of farm animal you make can depend on several factors, such as your personal interests, the requirements of the assignment, or the availability of materials.
- If you’re stuck on what animal to choose, consider making a classic barnyard animal like a pig, chicken, or goat.
4. Can I make a group of farm animals for my project?
- Yes, you can definitely make a group of farm animals for your project!
- This could involve creating a whole barnyard scene with multiple animals, or focusing on a specific group of animals like a flock of sheep or a herd of cows.
5. How can I make my farm animal stand out from others?
- To make your farm animal stand out, you can try adding unique details or features that make it different from other animals.
- For example, you could make a chicken with a brightly colored feather pattern, or give a pig a quirky expression by positioning its eyes and mouth in a fun way.
With these tips and ideas, you’ll be able to make a farm animal for your school project that is creative, fun, and sure to impress!

