Learn how to create fun and adorable farm animal face paint designs! From cows to pigs, let your creativity run wild with these easy steps.
If you want to add some fun and creativity to your child’s next farm-themed party, why not try doing some farm animal face paint? Not only will it bring a smile to your little one’s face, but it’s also a great way to unleash your inner artist. To get started, you’ll need some basic supplies such as face paint, sponges, brushes, and a steady hand. Now, let’s dive into the step-by-step process of transforming your child into their favorite farm animal! From moo-ing cows to oinking pigs, we’ve got you covered.
Are you looking for a fun and creative way to entertain your children? Why not try farm animal face paint! It is a great way to spend quality time with your kids and create something unique and exciting. In this article, we will guide you through the process of farm animal face paint.
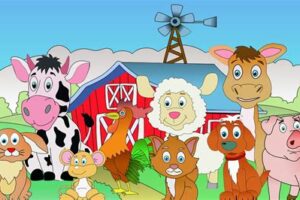
Choosing the Right Farm AnimalThe first step to creating farm animal face paint is choosing the right animal. There are many farm animals to choose from, including pigs, cows, horses, chickens, and sheep. Choose an animal that your child loves or let them choose their favorite animal.
Gathering SuppliesBefore starting the face painting process, make sure to gather all the necessary supplies. You will need face paint in various colors, brushes, sponges, and a mirror. It is also a good idea to have some damp paper towels on hand for cleaning up any mistakes.
Designing the Animal’s FaceOnce you have chosen the animal and gathered your supplies, it is time to start designing the animal’s face. Start with a sketch of the animal’s face on a piece of paper. This will help you see how the design will look before you start painting.
Painting the Base ColorStart by painting the base color of the animal’s face. Use a sponge or brush to apply the paint evenly. Make sure to cover the entire face, including the forehead, cheeks, nose, and chin.
Adding Farm Animal FeaturesNow it’s time to add the animal’s features. Use a fine brush to add details such as the animal’s eyes, nose, mouth, and ears. You can also add other features such as whiskers, spots, or stripes.
Finishing TouchesOnce you have added all the animal’s features, it’s time to add some finishing touches. Use a fine brush to add highlights and shadows to the animal’s face. This will make the face look more realistic and three-dimensional.
Animal Face Paint IdeasIf you need some inspiration for your farm animal face paint design, there are plenty of ideas available online. You can find tutorials and examples of different animals such as cows, pigs, and chickens. Get creative and make your design unique!
Removing Face PaintWhen the fun is over, it’s time to remove the face paint. Use a damp cloth to gently wipe away the paint. Make sure to avoid getting any paint in the child’s eyes or mouth.
Safety TipsWhen doing farm animal face paint, safety should always be a top priority. Make sure to use non-toxic face paint and avoid painting near the child’s eyes or mouth. If your child has sensitive skin, it is a good idea to do a patch test before applying the paint.
Enjoying Farm Animal Face PaintFarm animal face paint is a fun and creative way to spend time with your children. It can also be a great way to teach them about different animals and their features. So why not give it a try and see what kind of designs you can come up with!If you want to create a fun and memorable look for your child’s next farm-themed party, consider doing some farm animal face painting! To get started, the first step is to choose your animal inspiration. Whether it’s a cow, pig, or chicken, selecting an animal will give you a starting point for your design. Next, practice drawing the design on a piece of paper before applying it to your child’s face. This will help you identify any areas that may need extra attention. Once you feel confident, gather all the necessary supplies such as face paint, brushes, and stencils. Remember to have a damp cloth or baby wipes nearby to clean up any mistakes. Begin by applying a base coat of paint with a sponge, starting with the lightest color and working your way to the darkest. Then, use a small brush to define the animal’s features such as spots, stripes, or texture. Adding shading with a darker shade of paint or blending brush can create more dimension and make the design look more realistic. If you’re struggling with creating the animal design, try using stencils. Accessories like a nose or whiskers can help complete the look, so don’t forget to add those details. Lastly, seal the design with a setting spray or powder to keep it from smudging or running throughout the day and always offer touch-ups throughout the day. With these steps, you’ll be able to create a fun and unforgettable farm animal face paint design for your child’s next party!
Are you looking for a fun and creative way to entertain your kids? Why not try doing some farm animal face paint? Not only is it a great way to spend quality time with your little ones, but it’s also a fantastic way to unleash your inner artist. Here’s how to do farm animal face paint:
Materials:
- Face paint kit
- Paint brushes in various sizes
- A cup of water
- Paper towels
Step 1: Prep Your Brushes
Before you start painting, make sure your brushes are clean and ready to go. Dip them into the cup of water and wipe them off on the paper towel until they’re damp but not dripping.
Step 2: Choose Your Animal
Ask your child which farm animal they want to be. You can choose from cows, pigs, chickens, horses, and more. Once you’ve decided on an animal, look up some pictures online to use as reference.
Step 3: Paint the Base Color
Dip your brush into the face paint and start painting the base color onto your child’s face. For example, if they’re going to be a cow, paint their face white. If they’re going to be a pig, paint their face pink. Be sure to cover the entire face, avoiding the eyes and mouth.
Step 4: Add Details
Once the base color is dry, add details to your animal’s face. This is where you can get creative! Use different sized brushes to create spots, stripes, or other markings. For example, if your child is going to be a chicken, paint a red comb on their forehead and a yellow beak on their nose.
Step 5: Finish Up
Once you’re happy with your animal face paint, let it dry completely. You can use a hair dryer on the cool setting to speed up the process. Once it’s dry, your child is ready to show off their new farm animal face paint!
Overall, doing farm animal face paint is a fun and creative activity that both you and your child will enjoy. So gather your materials and get painting today!
Dear blog visitors,
It has been a pleasure sharing with you the art of farm animal face painting. I hope that this guide has been helpful in inspiring your creativity and giving you the tools to create some amazing designs. Whether you are a professional face painter or just starting out, the techniques and tips shared in this article will help you take your skills to the next level.
As we wrap up, it’s important to remember that practice makes perfect. Don’t be discouraged if your first few attempts don’t turn out exactly as planned. Keep trying, experimenting, and learning from your mistakes. With time and dedication, you will soon be able to create stunning farm animal face paint designs that will leave everyone in awe.
Lastly, don’t forget to have fun! Face painting is a form of artistic expression that should bring joy and excitement to both the artist and the person getting their face painted. So, get your brushes and paints ready and let your imagination run wild. Who knows, you might just create the next viral farm animal face paint trend!
Thank you for taking the time to read and learn from this article. I wish you all the best in your future endeavors and hope that you continue to explore the wonderful world of face painting.
Happy painting!
.
People also ask about How To Do Farm Animal Face Paint:
- What materials do I need to do farm animal face paint?
- How do I prepare my face for farm animal face paint?
- What are some popular farm animal face paint designs?
- What techniques can I use to create realistic-looking animal features?
- How do I remove farm animal face paint?
You will need face paint, brushes, sponges, water, and a mirror. You can also use stencils or reference pictures to help guide you in your designs.
Clean your face with mild soap and water before applying any face paint. Make sure your face is completely dry before starting.
Some popular designs include cows, pigs, chickens, horses, and sheep. You can also get creative and try other farm animals like goats, ducks, or rabbits.
You can use shading and highlighting techniques to create depth and dimension in your designs. You can also add texture with stippling or cross-hatching techniques.
Gently wipe away the face paint with a damp cloth or baby wipes. Avoid rubbing too hard as this can irritate the skin. Use mild soap and water to remove any remaining traces of face paint.
Remember, the key to successful farm animal face paint is to have fun and be creative. Don’t be afraid to experiment with different colors and designs to make your farm animal come to life!

