Table of Contents
Are you interested in starting a small worm farm? Vermicomposting, or worm farming, is a great way to recycle your food scraps and produce nutrient-rich fertilizer for your garden. And it’s easier than you think to get started!
Editor’s Note: “DIY Small Worm Farm” has been published today to give you step-by-step instructions to help you build your worm bin, choose the right worms, and feed your worms. We’ve also included tips on troubleshooting common problems.
We’ve done the research so that you don’t have to. We’ve read through countless articles and blog posts, and we’ve talked to experts in the field to bring you the most up-to-date information on worm farming.
Whether you’re a beginner or you’ve been vermicomposting for years, we think you’ll find this guide helpful. So what are you waiting for? Get started today and see how easy it is to compost with worms!
DIY Small Worm Farm
A DIY small worm farm is a great way to recycle your food scraps and produce nutrient-rich fertilizer for your garden.
- Location: Choose a shady spot in your backyard or garage.
- Bin: You can use a variety of materials to build your worm bin, such as wood, plastic, or metal.
- Worms: Red wigglers are the most popular type of worm for vermicomposting.
- Food: Worms eat a variety of food scraps, such as fruits, vegetables, and bread.
- Moisture: The bedding in your worm bin should be moist but not soggy.
- Temperature: Worms prefer temperatures between 55 and 75 degrees Fahrenheit.
- Harvesting: You can harvest worm castings every few months.
- Benefits: Worm castings are a great source of nutrients for your plants.
- Troubleshooting: There are a few common problems that you may encounter when vermicomposting, such as fruit flies and mold.
- Fun: Vermicomposting is a fun and educational activity for all ages.
These are just a few of the key aspects of DIY small worm farming. With a little planning and effort, you can easily start your own worm farm and enjoy the benefits of vermicomposting.
Location
The location of your worm bin is important for the health of your worms. Worms prefer dark, moist environments, so a shady spot in your backyard or garage is ideal. Avoid placing your worm bin in direct sunlight, as this can cause the bedding to dry out and the worms to overheat.
If you live in a cold climate, you may need to insulate your worm bin to protect the worms from the cold. You can do this by wrapping the bin in blankets or by placing it in a heated garage.
No matter where you choose to locate your worm bin, make sure that it is easily accessible so that you can add food scraps and harvest worm castings regularly.
Here are some of the benefits of choosing a shady spot for your worm bin:
- Worms prefer dark, moist environments.
- A shady spot will help to keep the bedding in your worm bin moist.
- A shady spot will help to protect the worms from the sun’s heat.
- A shady spot will help to prevent the growth of mold and fungus.
By choosing a shady spot for your worm bin, you can help to ensure that your worms are healthy and productive.
Bin
The type of bin you choose will depend on your budget, the size of your worm farm, and the materials you have available.
- Wooden bins are a good option if you want a durable and long-lasting bin. Wood is a natural insulator, so it will help to keep your worms warm in the winter and cool in the summer. However, wooden bins can be more expensive than other types of bins, and they may need to be treated with a sealant to prevent rot.
- Plastic bins are a good option if you want a lightweight and affordable bin. Plastic bins are easy to clean and move, and they are not susceptible to rot. However, plastic bins can be less durable than wooden bins, and they may not insulate as well.
- Metal bins are a good option if you want a durable and long-lasting bin that is also easy to clean. Metal bins are not susceptible to rot, and they can withstand extreme temperatures. However, metal bins can be more expensive than other types of bins, and they may rust if they are not properly maintained.
No matter what type of bin you choose, make sure that it has drainage holes in the bottom to allow excess moisture to escape. You will also need to provide a lid for your bin to keep out pests and predators.
By choosing the right bin for your worm farm, you can help to ensure that your worms are healthy and productive.
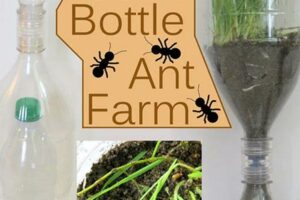
Worms
Red wigglers (Eisenia fetida) are the most popular type of worm for vermicomposting because they are efficient at breaking down organic matter and producing nutrient-rich castings. They are also relatively easy to care for and can tolerate a wide range of environmental conditions.
Red wigglers are epigeic worms, which means that they live in the top layer of soil or in organic matter on the ground. They are detritivores, which means that they feed on decaying organic matter. In a vermicomposting system, red wigglers will consume food scraps, paper, and other organic materials and convert them into nutrient-rich castings.
Red wigglers are prolific breeders and can produce up to 1,000 cocoons per year. Each cocoon contains several eggs, and the worms will hatch in about two weeks. The young worms will reach maturity in about three months.
Red wigglers are a valuable component of a DIY small worm farm. They are efficient at breaking down organic matter, producing nutrient-rich castings, and they are relatively easy to care for. By choosing red wigglers for your worm farm, you can help to create a sustainable and environmentally friendly way to recycle your food scraps and produce nutrient-rich fertilizer for your garden.
| Characteristic | Red Wigglers |
|---|---|
| Habitat | Top layer of soil or organic matter on the ground |
| Diet | Decaying organic matter |
| Reproduction | Prolific breeders, producing up to 1,000 cocoons per year |
| Benefits for vermicomposting | Efficient at breaking down organic matter, producing nutrient-rich castings, and relatively easy to care for |
Food
In a DIY small worm farm, the worms are responsible for breaking down organic matter and producing nutrient-rich castings. The type of food that you give your worms will have a direct impact on the quality of the castings.
- Variety is key. Worms eat a variety of food scraps, including fruits, vegetables, bread, and paper. By providing your worms with a variety of food scraps, you will ensure that they are getting all the nutrients they need.
- Avoid certain foods. There are a few foods that you should avoid giving your worms, such as meat, dairy products, and citrus fruits. These foods can be harmful to worms.
- Chop food scraps into small pieces. This will make it easier for the worms to eat the food.
- Bury food scraps in the bedding. This will help to keep the food moist and prevent it from attracting pests.
By following these tips, you can ensure that your worms are getting the food they need to produce nutrient-rich castings for your garden.
Moisture
Maintaining the correct moisture level in your worm bin is essential for the health of your worms. Worms breathe through their skin, so they need to have access to moisture in order to survive. However, too much moisture can drown worms, and too little moisture can cause them to dehydrate.
The ideal moisture level for a worm bin is about 60%. You can check the moisture level by squeezing a handful of bedding. If water drips out, the bedding is too wet. If the bedding feels dry to the touch, it is too dry.
If the bedding is too wet, you can add dry bedding to absorb the excess moisture. If the bedding is too dry, you can add water to the bin. You can also add kitchen scraps to the bin, as they will release moisture as they decompose.
Maintaining the correct moisture level in your worm bin is important for the health of your worms and the quality of the castings they produce. By following these tips, you can ensure that your worms have the moisture they need to thrive.
| Moisture Level | Effect on Worms |
|---|---|
| Too wet | Worms can drown |
| Too dry | Worms can dehydrate |
| Ideal | Worms can breathe and thrive |
Temperature
Temperature is an important factor to consider when setting up a DIY small worm farm. Worms are cold-blooded creatures, so their body temperature is regulated by the temperature of their environment. If the temperature is too cold, the worms will become inactive and stop eating. If the temperature is too hot, the worms will dehydrate and die.
- Ideal Temperature Range: The ideal temperature range for worms is between 55 and 75 degrees Fahrenheit. This temperature range allows the worms to be active and eat efficiently.
- Monitoring Temperature: It is important to monitor the temperature of your worm bin regularly, especially during extreme weather conditions. You can use a thermometer to measure the temperature of the bedding.
- Adjusting Temperature: If the temperature in your worm bin is too cold, you can add a heating pad or heat lamp to the bin. If the temperature is too hot, you can move the bin to a cooler location or add ice packs to the bin.
- Consequences of Incorrect Temperature: If the temperature in your worm bin is not within the ideal range, the worms may become inactive, stop eating, or even die.
By maintaining the correct temperature in your worm bin, you can help to ensure that your worms are healthy and productive.
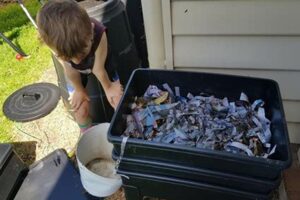
Harvesting
Harvesting worm castings is an important part of DIY small worm farming. Worm castings are a nutrient-rich fertilizer that can be used to improve the health of your plants. They are also a great way to recycle food scraps and other organic materials.
The frequency with which you harvest worm castings will depend on the size of your worm bin and the number of worms you have. A good rule of thumb is to harvest castings every few months, or when the bin is about one-third full.
To harvest worm castings, simply remove the lid of the bin and scoop out the castings from the bottom. You can use a trowel or a spoon to do this. Be careful not to disturb the worms.
Once you have harvested the castings, you can use them to fertilize your plants. Worm castings can be applied to the soil around plants, or they can be mixed into compost.
Harvesting worm castings is a simple and rewarding task. By following these steps, you can ensure that you are getting the most out of your DIY small worm farm.
| Harvesting Frequency | Benefits of Harvesting |
|---|---|
| Every few months | Improves plant health, recycles organic materials |
Benefits
Worm castings are a nutrient-rich fertilizer that can improve the health of your plants. They are a great way to recycle food scraps and other organic materials, and they can help to reduce your environmental impact.
Worm castings contain a variety of nutrients that are essential for plant growth, including nitrogen, phosphorus, potassium, calcium, and magnesium. They also contain beneficial microbes that can help to improve soil health and plant growth.
Using worm castings as a fertilizer can help to improve the following:
- Plant growth
- Yield
- Soil health
- Plant resistance to pests and diseases
If you are looking for a natural and sustainable way to fertilize your plants, worm castings are a great option. They are easy to use and they can provide your plants with the nutrients they need to thrive.
| Nutrient | Benefits for Plants |
|---|---|
| Nitrogen | Promotes plant growth and green foliage |
| Phosphorus | Enhances root development and flowering |
| Potassium | Improves water retention and stress tolerance |
| Calcium | Strengthens cell walls and improves fruit quality |
| Magnesium | Essential for chlorophyll production and photosynthesis |
Troubleshooting
Troubleshooting is an essential component of DIY small worm farming. Vermicomposting is a great way to recycle food scraps and produce nutrient-rich fertilizer for your garden, but there are a few common problems that you may encounter. By understanding the causes and solutions to these problems, you can keep your worm bin healthy and productive.
One common problem is fruit flies. Fruit flies are attracted to the food scraps in your worm bin, and they can quickly become a nuisance. To prevent fruit flies, make sure to bury food scraps in the bedding and keep the lid of your worm bin closed. You can also try using a fruit fly trap to catch any flies that do get into your bin.
Another common problem is mold. Mold can grow on the food scraps in your worm bin, and it can also be a problem if your bin is too moist. To prevent mold, make sure to keep the bedding in your worm bin moist but not soggy. You can also try adding some shredded cardboard or newspaper to the bin to help absorb excess moisture.
By understanding the causes and solutions to these common problems, you can keep your worm bin healthy and productive. Troubleshooting is an important part of DIY small worm farming, and it can help you to avoid any problems that may arise.
Table: Troubleshooting Common Problems in DIY Small Worm Farming
| Problem | Cause | Solution |
|---|---|---|
| Fruit flies | Food scraps not buried in bedding, lid not closed | Bury food scraps, keep lid closed, use fruit fly trap |
| Mold | Bedding too moist | Add shredded cardboard or newspaper to absorb moisture |
Fun
Vermicomposting, the process of using worms to break down organic matter, is not only beneficial for the environment but also a fun and educational activity for people of all ages. By providing a hands-on learning experience, DIY small worm farms can foster a deeper understanding of the natural world and the importance of sustainable practices.
- Educational Value: Vermicomposting offers a unique opportunity to observe firsthand the process of decomposition and nutrient cycling. Children and adults alike can learn about the role of worms in ecosystems, the importance of soil health, and the benefits of recycling organic waste.
- Sensory Experience: Interacting with worms and the compost bin provides a multi-sensory experience. The tactile nature of handling worms and the visual observation of the composting process can stimulate curiosity and engagement, making learning enjoyable.
- Community Involvement: DIY small worm farms can be a shared activity within families, schools, or community groups. By working together to care for the worms and manage the compost, individuals can foster a sense of responsibility and teamwork.
- Environmental Awareness: Vermicomposting empowers individuals to make a positive impact on the environment. By reducing landfill waste and producing nutrient-rich fertilizer, participants can develop a greater appreciation for sustainable living practices.
Incorporating vermicomposting into DIY small worm farms provides a fun and engaging way to promote environmental education, foster a connection with nature, and empower individuals to make a difference.
FAQs on DIY Small Worm Farms
Vermicomposting, often practiced in DIY small worm farms, raises various questions and misconceptions. This FAQ section aims to provide informative answers to common concerns, fostering a deeper understanding of the process and its benefits.
Question 1: What are the ideal conditions for maintaining a healthy worm bin?
Worms thrive in specific environmental conditions. Maintaining proper moisture levels, temperature range (55-75F), adequate aeration, and a pH balance between 6.5 and 7.5 ensures optimal worm activity and compost production.
Question 2: How often should I feed my worms?
Feeding frequency depends on the size of the worm bin and the number of worms. Generally, a small handful of food scraps per day is sufficient for a small bin. Avoid overfeeding, as excess food can lead to bin imbalances and attract pests.
Question 3: What types of food can I feed my worms?
Worms consume a wide range of organic materials, including fruit and vegetable scraps, coffee grounds, tea bags, and shredded paper. Avoid feeding them meat, dairy products, or citrus peels, as these can harm the worms or disrupt the composting process.
Question 4: How do I harvest worm castings?
Harvesting worm castings involves separating the nutrient-rich castings from the worms. A simple method is to place the bin contents on a mesh screen or newspaper and allow the worms to migrate to the bottom, leaving the castings behind. Alternatively, the “sandwich” method, where fresh bedding is placed on top and bottom, encourages worms to move to the middle layer, which can then be harvested.
Question 5: What are the benefits of using worm castings as fertilizer?
Worm castings are a valuable organic fertilizer rich in nutrients and beneficial microbes. They enhance soil structure, improve water retention, and promote plant growth. Studies have shown positive effects on crop yields, resistance to pests and diseases, and overall soil health.
Question 6: How can I troubleshoot common problems in my worm bin?
Potential issues in worm bins include fruit fly infestation, mold growth, or unpleasant odors. Maintaining proper moisture levels, avoiding overfeeding, and ensuring adequate ventilation can prevent these problems. If issues arise, identify the cause and adjust the bin conditions accordingly.
Summary: DIY small worm farms offer an eco-friendly and educational way to manage organic waste while producing valuable fertilizer. Understanding the key factors for worm health, feeding practices, and troubleshooting common issues empowers individuals to maintain thriving worm bins and reap the benefits of vermicomposting.
Transition to the next article section: Exploring advanced techniques and innovative applications of DIY small worm farms can further enhance the composting process and maximize its environmental impact.
Tips for Successful DIY Small Worm Farms
Vermicomposting in DIY small worm farms requires careful attention to the needs of the worms and the composting process. Implementing the following tips can help ensure a thriving worm bin and high-quality compost production:
Tip 1: Choose the Right Worms
Selecting the appropriate worm species is crucial. Red wigglers (Eisenia fetida) are highly recommended for their efficiency in breaking down organic matter and tolerance to a wide range of conditions.
Tip 2: Maintain Ideal Conditions
Worms thrive in specific environmental parameters. Ensure proper moisture levels (avoiding sogginess), an optimal temperature range (55-75F), adequate aeration, and a pH balance between 6.5 and 7.5.
Tip 3: Feed Wisely
Provide a diverse range of organic materials, such as fruit and vegetable scraps, coffee grounds, and shredded paper. Avoid overfeeding, as excess food can disrupt the bin’s balance.
Tip 4: Monitor Regularly
Regularly observe the worm bin for signs of imbalance. Check for moisture levels, excessive heat or odors, and the presence of pests or mold. Promptly address any issues to maintain a healthy environment.
Tip 5: Harvest Castings Properly
Harvesting worm castings involves separating them from the worms. Employ techniques like the mesh screen method or the “sandwich” method to gently collect the nutrient-rich castings.
Tip 6: Utilize Castings Effectively
Worm castings are a valuable organic fertilizer. Apply them to plants to enhance soil structure, improve water retention, and promote growth.
Tip 7: Consider Advanced Techniques
Explore advanced techniques like continuous flow-through systems or vermiculture towers to optimize the composting process and increase productivity.
Tip 8: Educate and Engage
Share your knowledge about DIY small worm farms with others. Educate children and adults about vermicomposting, its environmental benefits, and its role in sustainable living.
By implementing these tips, you can establish and maintain a thriving DIY small worm farm, effectively manage organic waste, and produce nutrient-rich compost for your garden.
Conclusion
DIY small worm farms offer a practical and eco-friendly solution for waste management and the production of nutrient-rich fertilizer. By understanding the key principles of vermicomposting and implementing best practices, individuals can establish and maintain thriving worm bins. The benefits of DIY small worm farms extend beyond waste reduction, contributing to soil health, plant growth, and overall environmental sustainability.
The exploration of DIY small worm farms highlights the importance of responsible waste management practices and the power of natural processes in creating valuable resources. As we strive towards a more sustainable future, vermicomposting should be considered a valuable tool for individuals and communities alike.
Youtube Video: