Table of Contents
Wondering how to start a DIY compost worm farm? Look no further! We’ve put together a comprehensive guide to help you get started.
Editor’s Note: DIY compost worm farms are becoming increasingly popular as people look for ways to reduce their environmental impact and create nutrient-rich compost for their gardens.
After doing some analysis and digging around for information, we’ve put together this DIY compost worm farm guide to help you make the right decision when it comes to starting your own. We’ll cover everything from the basics of vermicomposting to tips on how to build your own worm bin. So whether you’re a complete beginner or you’re just looking to learn more about DIY compost worm farms, we’ve got you covered!
Key Differences or Key Takeaways
| DIY Compost Worm Farm | Benefits | ||
|---|---|---|---|
| Reduces environmental impact | Nutrient-rich compost for your garden | Easy to build and maintain | Can be used indoors or outdoors |
Transition to main article topicsNow that you know a little bit more about DIY compost worm farms, let’s take a closer look at the benefits, how to build your own, and how to maintain it.
………
DIY Compost Worm Farm
DIY compost worm farms are becoming increasingly popular as people look for ways to reduce their environmental impact and create nutrient-rich compost for their gardens. To ensure a successful and efficient worm farm, it is essential to consider various key aspects:
- Bin size: The size of the bin will depend on the amount of waste you produce and the number of worms you want to keep.
- Bedding material: The bedding material provides a habitat for the worms and helps to absorb moisture.
- Food scraps: Worms can eat a variety of food scraps, including fruits, vegetables, and bread.
- Moisture levels: The bedding material should be moist but not soggy.
- Temperature: Worms prefer to live in a warm environment, so the bin should be placed in a warm spot.
- Aeration: The bin should have holes to allow for air circulation.
- Drainage: The bin should have holes in the bottom to allow for excess moisture to drain away.
- Harvesting: Compost can be harvested from the bin every few months.
By considering these key aspects, you can create a DIY compost worm farm that will provide you with nutrient-rich compost for your garden while also reducing your environmental impact. For example, using a larger bin will allow you to compost more food scraps, and using a variety of bedding materials will help to create a healthy environment for the worms. Additionally, by monitoring the moisture levels and temperature of the bin, you can ensure that the worms are thriving.
Bin size
The size of the bin is an important consideration when setting up a DIY compost worm farm. The bin should be large enough to accommodate the amount of waste you produce, as well as the number of worms you want to keep. A good rule of thumb is to use a bin that is at least 1 cubic foot in size for every pound of worms you want to keep. For example, if you want to keep 1 pound of worms, you would need a bin that is at least 1 cubic foot in size. If you want to keep more worms, you will need a larger bin.
The size of the bin will also affect the amount of food scraps you can add to the bin. A larger bin will allow you to add more food scraps, which will in turn produce more compost. However, it is important to not overload the bin with food scraps, as this can lead to problems with odor and pests.
It is also important to consider the amount of space you have available when choosing the size of your bin. If you have a small space, you may want to choose a smaller bin. However, if you have a larger space, you may want to choose a larger bin so that you can compost more food scraps.
Key Insights
- The size of the bin is an important consideration when setting up a DIY compost worm farm.
- The bin should be large enough to accommodate the amount of waste you produce, as well as the number of worms you want to keep.
- A good rule of thumb is to use a bin that is at least 1 cubic foot in size for every pound of worms you want to keep.
- The size of the bin will also affect the amount of food scraps you can add to the bin.
- It is important to consider the amount of space you have available when choosing the size of your bin.
Bedding material
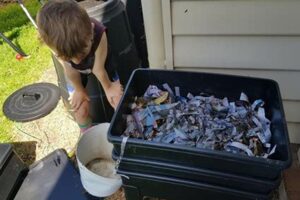
Bedding material is an essential component of a DIY compost worm farm. It provides a habitat for the worms, helping to keep them warm and comfortable. It also helps to absorb moisture, preventing the bin from becoming too wet. There are a variety of different materials that can be used for bedding, including shredded paper, cardboard, and straw.
- Shredded paper: Shredded paper is a good choice for bedding because it is absorbent and provides a good habitat for worms. It is also relatively inexpensive and easy to find.
- Cardboard: Cardboard is another good choice for bedding. It is absorbent and provides a good habitat for worms. However, it is important to make sure that the cardboard is not treated with chemicals, as this can be harmful to the worms.
- Straw: Straw is a good choice for bedding because it is absorbent and provides a good habitat for worms. However, it is important to make sure that the straw is not moldy or dusty, as this can be harmful to the worms.
The type of bedding material that you choose will depend on your individual needs and preferences. It is important to experiment with different materials to see what works best for you and your worms.
Food scraps
Food scraps are an essential part of a DIY compost worm farm. Worms eat food scraps and turn them into nutrient-rich compost, which can be used to fertilize plants. The type of food scraps that you feed your worms will affect the quality of the compost. It is important to feed your worms a variety of food scraps, including fruits, vegetables, and bread.
Fruits and vegetables are a good source of nutrients for worms. They are also high in moisture, which helps to keep the bin moist. Bread is a good source of carbohydrates for worms. It is important to not feed your worms too much bread, as this can lead to problems with odor and pests.
In addition to fruits, vegetables, and bread, you can also feed your worms other types of food scraps, such as coffee grounds, tea bags, and eggshells. It is important to avoid feeding your worms meat, dairy products, and processed foods. These foods can be harmful to worms.
By feeding your worms a variety of food scraps, you can help to create a healthy and productive compost worm farm.
| Food Scrap | Benefits |
|---|---|
| Fruits | High in nutrients and moisture |
| Vegetables | High in nutrients and moisture |
| Bread | Good source of carbohydrates |
| Coffee grounds | Good source of nitrogen |
| Tea bags | Good source of tannins |
| Eggshells | Good source of calcium |
Moisture levels
Moisture levels are an important factor to consider when maintaining a DIY compost worm farm. The bedding material should be moist but not soggy. If the bedding is too dry, the worms will not be able to move around easily and they may become dehydrated. If the bedding is too wet, the worms may drown or develop diseases.
The ideal moisture level for a DIY compost worm farm is about 60%. You can check the moisture level by squeezing a handful of bedding material. If water drips out, the bedding is too wet. If the bedding feels dry to the touch, the bedding is too dry.
There are a few things you can do to adjust the moisture level in your DIY compost worm farm. If the bedding is too dry, you can add some water to the bin. If the bedding is too wet, you can add some dry bedding material to the bin. You can also adjust the moisture level by adding or removing food scraps. Food scraps contain moisture, so adding food scraps to the bin can help to increase the moisture level. Removing food scraps from the bin can help to decrease the moisture level.
It is important to monitor the moisture level in your DIY compost worm farm regularly. By keeping the moisture level at about 60%, you can help to ensure that your worms are healthy and productive.
| Moisture Level | Effect on Worms |
|---|---|
| Too dry | Worms will not be able to move around easily and they may become dehydrated. |
| Too wet | Worms may drown or develop diseases. |
| Ideal (about 60%) | Worms are healthy and productive. |
Temperature
Temperature is an important factor to consider when maintaining a DIY compost worm farm. Worms prefer to live in a warm environment, so the bin should be placed in a warm spot. The ideal temperature for a worm bin is between 55 and 75 degrees Fahrenheit. If the temperature is too cold, the worms will become dormant and stop eating. If the temperature is too hot, the worms may die.
- Placement: The best place to put a worm bin is in a warm, dark place, such as a basement or garage. If you live in a cold climate, you may need to insulate the bin to keep it warm.
- Heating: If you live in a very cold climate, you may need to provide supplemental heat to the worm bin. This can be done using a heating pad or a light bulb.
- Monitoring: It is important to monitor the temperature of the worm bin regularly. You can use a thermometer to check the temperature.
By keeping the temperature of the worm bin within the ideal range, you can help to ensure that your worms are healthy and productive.
Aeration
Aeration is essential for a healthy DIY compost worm farm. Worms need oxygen to breathe, and they will not be able to survive in a bin that is not properly aerated. Holes in the bin allow for air to circulate, which provides the worms with the oxygen they need to survive. Without proper aeration, the worms will suffocate and die.
There are a few different ways to provide aeration for your worm bin. One way is to drill holes in the sides of the bin. Another way is to use a lid that has holes in it. You can also use a fan to circulate air in the bin.
It is important to make sure that the holes in the bin are not too large. If the holes are too large, the worms will be able to escape. The holes should be small enough so that the worms can’t fit through them, but large enough so that air can circulate freely.
By providing proper aeration for your worm bin, you can help to ensure that your worms are healthy and productive.
| Aeration | Importance |
|---|---|
| Holes in the bin | Allow for air circulation |
| Provides worms with oxygen | Prevents worms from suffocating |
| Different ways to provide aeration | Drill holes in the sides of the bin, use a lid with holes, or use a fan |
Drainage
Proper drainage is essential for a successful DIY compost worm farm. Excess moisture can lead to a number of problems, including:
- Anaerobic conditions: Excess moisture can create anaerobic conditions in the bin, which can lead to the production of harmful gases and odors.
- Drowning: Worms can drown if the bin is too wet.
- Disease: Excess moisture can create a breeding ground for bacteria and other pathogens that can harm worms.
To prevent these problems, it is important to ensure that the bin has adequate drainage. Holes in the bottom of the bin allow for excess moisture to drain away, keeping the bin moist but not soggy.
The size and number of holes will depend on the size of the bin and the type of bedding material used. A good rule of thumb is to drill 1/4-inch holes every 6 inches around the bottom of the bin.
By providing proper drainage for your DIY compost worm farm, you can help to ensure that your worms are healthy and productive.
| Drainage | Importance |
|---|---|
| Holes in the bottom of the bin | Allow for excess moisture to drain away |
| Prevents anaerobic conditions | Prevents drowning |
| Prevents disease | Keeps worms healthy and productive |
Harvesting
Harvesting is an essential part of maintaining a diy compost worm farm. Compost is the nutrient-rich material that is produced by the worms as they break down food scraps and other organic matter. Compost can be used to fertilize plants, improve soil structure, and suppress plant diseases.
- Timing: Compost can be harvested from the bin every few months, depending on the size of the bin, the number of worms, and the amount of food scraps being added.
- Process: Harvesting compost is a simple process. To harvest compost, simply remove the lid from the bin and scoop out the finished compost from the bottom of the bin.
- Uses: Compost can be used in a variety of ways. It can be added to potting mix, used as a top dressing for plants, or mixed into the soil. Compost can also be used to make compost tea, which is a liquid fertilizer that can be used to water plants.
Harvesting compost is a great way to reduce your environmental impact and create a nutrient-rich fertilizer for your plants. By following these simple steps, you can easily harvest compost from your diy compost worm farm.
FAQs about DIY Compost Worm Farms
Composting with worms is a great way to reduce your environmental impact and create nutrient-rich fertilizer for your garden. However, there are some common questions and concerns that people have about starting a DIY compost worm farm.
Question 1: What kind of worms should I use?
Answer: Red wigglers (Eisenia fetida) are the most popular type of worm for composting. They are efficient at breaking down organic matter and can tolerate a wide range of environmental conditions.
Question 2: What do I feed my worms?
Answer: Worms can eat a variety of food scraps, including fruits, vegetables, bread, and coffee grounds. Avoid feeding your worms meat, dairy products, or processed foods.
Question 3: How often should I feed my worms?
Answer: Worms should be fed once or twice a week. The amount of food you give them will depend on the size of your bin and the number of worms you have.
Question 4: How do I harvest the compost?
Answer: Compost can be harvested from the bin every few months. To harvest the compost, simply remove the lid from the bin and scoop out the finished compost from the bottom of the bin.
Question 5: What are the benefits of using compost?
Answer: Compost improves soil structure, fertility, and water retention. It can also help to suppress plant diseases.
Question 6: Is it difficult to maintain a compost worm farm?
Answer: No, compost worm farms are relatively easy to maintain. They require minimal care and can be kept in a variety of locations.
By following these tips, you can easily start and maintain a successful DIY compost worm farm.
Summary: DIY compost worm farms are an increasingly popular way to create nutrient-rich compost for the garden. By choosing the right type of worms, feeding them a variety of food scraps, and providing them with a proper environment, you can easily create a thriving compost worm farm that will provide you with years of nutrient-rich compost.
DIY Compost Worm Farm Tips
DIY compost worm farms are a great way to reduce your environmental impact and create nutrient-rich compost for your garden. By following these tips, you can ensure that your compost worm farm is successful.
Tip 1: Choose the right type of worms.
Red wigglers (Eisenia fetida) are the most popular type of worm for composting. They are efficient at breaking down organic matter and can tolerate a wide range of environmental conditions.
Tip 2: Feed your worms a variety of food scraps.
Worms can eat a variety of food scraps, including fruits, vegetables, bread, and coffee grounds. Avoid feeding your worms meat, dairy products, or processed foods.
Tip 3: Provide your worms with a proper environment.
Worms need a dark, moist environment to thrive. Keep your compost bin in a warm spot and make sure that the bedding material is moist but not soggy.
Tip 4: Harvest the compost regularly.
Compost can be harvested from the bin every few months. To harvest the compost, simply remove the lid from the bin and scoop out the finished compost from the bottom of the bin.
Tip 5: Use the compost to fertilize your plants.
Compost is a nutrient-rich fertilizer that can be used to improve soil structure, fertility, and water retention. Compost can also help to suppress plant diseases.
Summary: By following these tips, you can easily start and maintain a successful DIY compost worm farm. Compost worm farms are a great way to reduce your environmental impact and create nutrient-rich compost for your garden.
DIY Compost Worm Farm
In conclusion, DIY compost worm farms offer a sustainable and effective way to reduce waste, create nutrient-rich fertilizer, and improve soil health. By following the principles outlined in this guide, you can easily start and maintain a successful compost worm farm that will provide you with years of benefits.
As the world faces increasing environmental challenges, DIY compost worm farms are becoming an increasingly important tool for reducing our impact on the planet. By embracing sustainable practices such as composting, we can create a more sustainable future for ourselves and for generations to come.
Youtube Video: