Learn how to make adorable miniature farm animals with this easy tutorial. Perfect for dollhouses, fairy gardens, or just for fun!
If you’re a fan of miniatures, then you’ll surely love making miniature farm animals. Not only is it a fun and creative activity, but it also allows you to showcase your artistic skills. Plus, it’s a great way to unwind and relax after a long day. Whether you’re a beginner or an experienced crafter, making miniature farm animals can be a rewarding experience. In this guide, we’ll show you how to make cute and realistic miniature farm animals using some basic materials and techniques. So, grab your tools and let’s get started!
Are you looking for a fun and creative way to make miniature farm animals? Look no further! In this article, we will explore how to make miniature farm animals using common materials found around the house.
Gather Your Materials
The first step in making miniature farm animals is to gather your materials. You will need:- Polymer clay- Wire- Toothpicks- Paint- Paintbrushes- Glue
Choose Your Animal
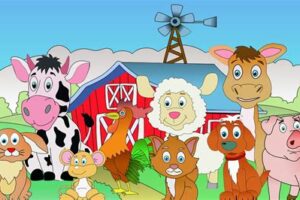
Once you have gathered your materials, it’s time to choose which animal you want to make. Some popular choices include cows, pigs, chickens, and sheep. Choose an animal that you are familiar with and that you think will be fun to make.
Create the Body
To create the body of your miniature farm animal, you will need to shape the polymer clay into the desired shape. Use your hands to mold the clay into the shape of the animal, adding details such as ears, legs, and a tail.
Add Details
Once you have the basic shape of your animal, it’s time to add some details. Use toothpicks to create texture on the animal’s fur or feathers, and add eyes, nostrils, and a mouth using small pieces of clay.
Make the Legs
To make the legs of your miniature farm animal, cut a piece of wire to the desired length and bend it into the shape of the legs. Insert the wire into the body of the animal, being careful not to disturb the clay.
Bake the Animal
Once you have finished creating your miniature farm animal, it’s time to bake it. Follow the instructions on the polymer clay package for baking times and temperatures.
Paint the Animal
After your miniature farm animal has cooled, it’s time to paint it. Use acrylic paint and a small paintbrush to add color and detail to your animal. Be sure to let the paint dry completely before handling your animal.
Add Final Details
Once the paint has dried, you can add final details such as a ribbon around the animal’s neck or a tuft of fur on its head. Use glue to attach any additional details.
Display Your Animals
Your miniature farm animals are now complete! Display them on a shelf or use them in a diorama or miniature farm scene.
Conclusion
Making miniature farm animals is a fun and creative activity that can be enjoyed by people of all ages. With just a few materials and some imagination, you can create your own miniature farm animal collection. So why not get started today?
Are you ready for a fun and creative project? Why not try making miniature farm animals? These cute little creatures are perfect for dollhouse play or as a decorative display piece. Before you start, you need to choose the right materials. We recommend using polymer clay, which is easy to shape and dries hard. You’ll also need a set of small sculpting tools, such as a mini knife, needle tool, and sculpting brush.
To get started, knead your polymer clay until it’s soft and pliable. Then, shape it into the desired animal form. You can mold the clay with your hands or use the sculpting tools to create intricate details like fur, feathers, and hooves. Let’s begin with a pig. Start by shaping a small ball of pink clay into the pig’s body. Then, add a smaller ball for the head and two tiny pieces for the ears. Use a sculpting tool to define the pig’s facial features, and add texture to its body with small grooves.
Next up, we have cows. To create a miniature cow, shape two separate balls of clay for the body and head. Connect the two pieces with a toothpick or wire, and add small pieces for the ears and tail. Use a sculpting tool to define the cow’s eyes, nostrils, and udders. For miniature horses, start with a ball of clay for the body and shape it into a tapered form. Then, add a separate piece for the head and two small pieces for the ears. Use a sculpting tool to create details such as the horse’s mane, tail, and hooves.
If you want to craft a miniature chicken, shape a small ball of yellow clay into an egg shape for the body. Then, add a smaller ball for the head and two tiny pieces for the wings. Use a sculpting tool to add texture to the chicken’s feathers and create a beak and eyes. Once you’ve made your miniature farm animals, you can create a fun and imaginative display by assembling them into miniature farm scenes. You can use a dollhouse or miniature barn as the backdrop, and add other accessories like fences, hay bales, and small plants.
To add the finishing touches to your miniature farm animals, you can paint them with acrylic paint or use a clear glaze to protect the polymer clay. You can also add small details like spots, stripes, or freckles with a fine-tip paintbrush. Now that you know how to make miniature farm animals, you can enjoy the fun of creating your own unique miniatures. Whether you want to create a farm display or use them as toys for playtime, these adorable little animals are sure to bring a smile to your face.
Are you interested in making miniature farm animals? It’s a fun and creative way to express your artistic skills. Here’s how you can make your own miniature farm animals:
- First, gather all the necessary materials. You will need polymer clay, sculpting tools, and acrylic paint.
- Decide which animal you want to make. For example, you can choose to make a miniature cow, pig, horse, or sheep.
- Mold the polymer clay into the shape of the animal using your sculpting tools. Pay attention to the details such as the eyes, ears, and tail.
- Once you have the basic shape of the animal, add texture and details to make it look more realistic. Use the sculpting tools to create fur or feathers depending on the animal you’re making.
- Bake the clay in the oven according to the instructions on the packaging. This will harden the clay and make it durable.
- After the clay has cooled down, it’s time to paint your animal. Use acrylic paint to add color and detail to your creation. Be patient and take your time to ensure you get the right colors and patterns.
- Finally, let the paint dry completely before handling your miniature farm animal. You can display it in your room or give it as a gift to a friend who loves animals.
With a little bit of patience and creativity, you can make your own miniature farm animals that are unique and special. So why not give it a try and see what you can create? Happy sculpting!
Well, fellow crafters and animal lovers, we have reached the end of our miniature farm animal journey. I hope you have enjoyed learning how to make these adorable creatures as much as I have loved creating them. As we close this chapter, I have a few final thoughts to share with you.
Firstly, don’t be afraid to experiment and make these animals your own. You can use different materials, colors, and textures to create unique and personalized creatures. Maybe you want to add a little bow to your pig or make your sheep extra fluffy – go for it! The beauty of crafting is that there are no rules, so let your imagination run wild.
Secondly, remember that practice makes perfect. If your first attempt at making a miniature farm animal doesn’t turn out exactly how you envisioned, don’t get discouraged. Keep trying, keep refining your technique, and soon enough, you’ll be able to create stunning animals that will impress everyone who sees them.
Finally, I’d like to encourage you to share your creations with others. Whether it’s through social media, a blog, or by simply showing them off to your friends and family, sharing your work can bring so much joy and inspiration to others. Who knows, maybe you’ll even inspire someone else to start their own mini animal farm!
So, with that, we come to the end of this blog post. I hope you’ve learned something new, had fun, and feel inspired to get crafting. Thank you for joining me on this journey, and I can’t wait to see all the amazing miniature farm animals you create!
.
People also ask about How To Make Miniature Farm Animals:
- What materials do I need to make miniature farm animals?
- You can use polymer clay, felt, fabric, foam, and other crafting materials to create miniature farm animals.
- How do I sculpt miniature farm animals?
- You can use polymer clay to sculpt miniature farm animals. First, create a wire armature for the animal’s skeleton, then cover it with clay and shape it into the desired form. Use tools to add texture and detail.
- Can I sew miniature farm animals?
- Yes, you can sew miniature farm animals using felt or fabric. Cut out the pattern pieces and sew them together, stuffing with fiberfill as you go. Add details with embroidery thread or fabric paint.
- How can I make miniature farm animals look realistic?
- Use reference photos to study the anatomy and coloring of the animal you want to create. Add texture and shading to your sculpture or use realistic fabrics for your sewn animals. You can also add details like eyes and hooves with paint or markers.
- What are some tips for making miniature farm animals?
- Start with simple shapes and work your way up to more complex animals. Use a magnifying glass to help with fine details. Experiment with different materials to find what works best for you. And most importantly, have fun!