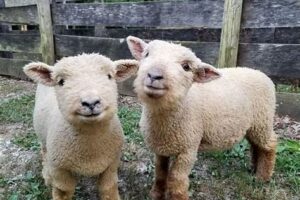
Learn how to make fun and easy farm animal masks with our step-by-step tutorial. Perfect for kids’ parties or imaginative play!
Are you looking for a fun and simple activity to do with your kids or students? Making farm animal masks is a great way to engage children in creativity, while also teaching them about different animals and their characteristics. Not to mention, it’s an excellent opportunity for them to practice their fine motor skills and color recognition. In this guide, we’ll walk you through the steps of creating three different farm animal masks: a cow, a pig, and a sheep. So, gather your materials and let’s get started!
Gather Your Supplies
Before you get started, you’ll need to gather a few supplies. Here’s what you’ll need:
- Cardstock paper in various colors
- Scissors
- Glue
- Markers or crayons
- Elastic string or ribbon
- Pencil
- Ruler
Choose Your Animal
The first step in making a farm animal mask is choosing which animal you want to create. There are plenty of options to choose from, such as cows, pigs, horses, and chickens. Once you’ve decided on your animal, it’s time to start creating!
Draw and Cut Out Your Mask
Using the cardstock paper, draw an outline of your animal’s face. Use a pencil and ruler to make sure your lines are straight and even. Once you have your outline, cut it out carefully with scissors.
Add Details
Now that you have the basic outline of your mask, it’s time to add some details. Use markers or crayons to add eyes, a nose, and any other features your animal has. For example, if you’re making a cow mask, you can add spots and ears.
Attach Elastic String or Ribbon
To wear your mask, you’ll need to attach either elastic string or ribbon to the back. Cut two pieces of elastic or ribbon to fit around your head, then glue them to the sides of the mask.
Create Additional Features
If you want to take your mask to the next level, you can create additional features like ears or a snout. For example, if you’re making a pig mask, you can cut out two circles for ears and attach them to the top of the mask.
Make It 3D
If you want to make your mask more realistic, you can make it 3D by adding layers of cardstock. Cut out additional pieces of paper for the animal’s snout or ears, then attach them to the main mask with glue.
Personalize Your Mask
To make your mask even more unique, you can personalize it with your child’s name or other decorations. Use markers or stickers to add a personal touch.
Create a Farm Animal Scene
Once you’ve finished making your mask, you can create a farm animal scene using other materials like construction paper or play dough. This is a great way to make the craft project even more fun and interactive.
Teach About Farm Animals
Making farm animal masks is not only a fun craft project, but it’s also a way to teach children about different animals and their characteristics. Take some time to talk about each animal as you make their mask, and encourage your child to ask questions and learn more.
Have Fun!
Above all else, remember to have fun while making farm animal masks. This is a great way to spend quality time with your child while also encouraging creativity and learning.If you’re looking for a fun and creative project to do, why not make a farm animal mask? Here’s a step-by-step guide on how to make one:
First, gather all the materials you need. You will need construction paper, scissors, glue, and markers. Once you have everything, it’s time to choose which farm animal you want to create. You can choose from cows, pigs, horses, or chickens, or any other farm animals that you like.
Next, measure your face to ensure that the mask will fit perfectly. This is important because you don’t want your mask to be too tight or too loose. Once you have your measurements, draw the pattern of the animal’s facial features on the paper. Don’t forget to include ears, nose, eyes, and whiskers, if necessary.
After drawing the pattern, cut out the paper according to the pattern you’ve drawn. Make sure to follow the lines carefully to get the right shape and size. Once you have all the pieces cut out, it’s time to assemble your mask. Use glue to connect all the pieces together to form your mask.
Now it’s time to add some finishing touches. Use markers or other decorations to add details to your animal mask. For example, you can draw spots on a cow mask or use pink for a pig’s nose and ears. Be as creative as you want!
Before you finish, make sure to try on your mask to ensure that it fits well and is comfortable to wear. If it doesn’t fit properly, you might want to adjust it accordingly.
Once you’re happy with your mask, take a picture with it and show it off to your family and friends. You can also use your farm animal mask for pretend play, as a party accessory, or even for a school project. Wear your mask proudly and enjoy being creative with your awesome farm animal mask!
Are you looking for a fun and creative activity to do with your kids or students? Why not make farm animal masks! Here’s how:
Materials:
- Cardstock paper
- Pencil
- Scissors
- Glue stick
- Markers or crayons
- Elastic band
Steps:
- Choose which farm animal you want to make a mask of. Some great options are cows, pigs, chickens, horses, and sheep.
- Draw the outline of the animal’s head on the cardstock paper with a pencil. Make sure to include ears, eyes, nose, and a mouth.
- Cut out the animal’s head shape with scissors.
- Use markers or crayons to color in the animal’s features, such as pink for a pig’s snout or black for a cow’s nose.
- Next, cut out the ears separately and color them in as well.
- Using the glue stick, attach the ears to the top of the animal’s head.
- Make two small holes on each side of the mask where the elastic band will go.
- Attach the elastic band to the mask by threading it through the holes and tying a knot on each end.
- Put on the mask and have fun pretending to be your favorite farm animal!
Making farm animal masks is a great way to encourage creativity and imagination in children. By using different colors and shapes, they can personalize their masks and bring their favorite farm animals to life. So gather your materials and start creating!
Well, that’s it folks! We hope you found this tutorial on how to make farm animal masks both fun and informative. It was a pleasure sharing our crafting ideas with you, and we hope you’ll come back soon for more creative inspiration.
Remember, making your own masks is not only an enjoyable activity, but it also encourages creativity and imaginative play for children. It’s a great way to spend quality time with your family or friends and create lasting memories.
If you have any questions or comments about the tutorial, please don’t hesitate to leave them in the comment section below. We’d love to hear from you! And if you decide to make some masks, be sure to share your creations with us on social media using the hashtag #farmanimalmasks. We can’t wait to see what you come up with!
Thanks again for visiting our blog, and happy crafting!
Video How To Make Farm Animal Mask
People also ask about how to make farm animal masks. Here are some of the questions that people commonly ask about this topic:
- 1. What materials do I need to make a farm animal mask?
- 2. How do I choose which farm animal to make a mask of?
- 3. What is the best way to create the shape of the mask?
- 4. How do I add details like ears, whiskers, and snouts to my mask?
- 5. What techniques can I use to paint or decorate my mask?
Let’s take a closer look at each of these questions:
1. What materials do I need to make a farm animal mask?
You will need some basic supplies such as:
- Cardboard or construction paper for the base of the mask.
- Scissors, glue, and tape to assemble the mask.
- Paint or markers to decorate the mask.
- Additional items such as pipe cleaners, cotton balls, or feathers to add texture and dimension.
2. How do I choose which farm animal to make a mask of?
Consider the following when deciding which animal to make a mask of:
- Your child’s favorite animal or one they have been learning about in school.
- The type of event the mask will be worn for (such as a Halloween party or school play).
- The level of complexity you are comfortable with in terms of creating the mask shape and adding details.
3. What is the best way to create the shape of the mask?
You can create the base of your mask by:
- Tracing a pre-made template onto cardboard or construction paper.
- Using a paper plate as a base and cutting out eye holes and other details.
- Making a simple oval or rectangular shape and cutting out additional features like ears or snouts separately to glue onto the base.
4. How do I add details like ears, whiskers, and snouts to my mask?
You can add these features by:
- Cutting them out of paper or cardboard and gluing them onto the base of the mask.
- Using pipe cleaners or straws to create ears or whiskers that stand up from the mask.
- Using cotton balls or tissue paper to create a fluffy texture for certain animals like sheep or rabbits.
5. What techniques can I use to paint or decorate my mask?
You can decorate your mask by:
- Painting it with acrylic paints or markers.
- Adding texture with sponges or brushes dipped in paint.
- Using glitter or sequins to add sparkle.
- Adding additional details with fabric scraps or other materials.
With a little creativity, you can make farm animal masks that are both fun and educational for kids!

