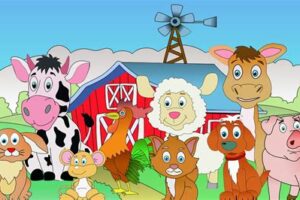
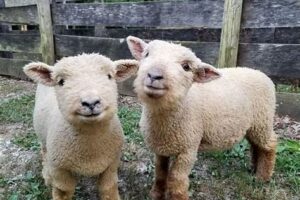
Learn how to make adorable fondant farm animals for cakes with our step-by-step guide! Perfect for any animal lover’s birthday cake.
Are you looking to take your cake decorating skills to the next level? Why not try making fondant farm animals to adorn your cakes? These cute and whimsical creatures will surely impress your guests and make your desserts stand out. Plus, it’s a fun and creative activity that you can do with your kids or friends. Don’t worry if you have never worked with fondant before, we will guide you step-by-step on how to make these adorable farm animals. So, roll up your sleeves, grab your rolling pin, and let’s get started!
Are you looking to add a cute and whimsical touch to your next cake creation? Why not try making fondant farm animals? These adorable creatures are sure to delight both kids and adults alike. And the best part is, they’re easier to make than you might think! Follow these simple steps to create your own fondant farm animals.
Gather Your Materials
Before you begin, make sure you have all the necessary materials on hand:
- Fondant in various colors
- Cornstarch or powdered sugar (for dusting your work surface)
- A rolling pin
- A sharp knife or fondant cutter
- Small cookie cutters in various shapes and sizes (optional)
- Edible glue or water (for attaching pieces together)
- A clean, flat work surface
Start with a Basic Shape
Begin by shaping a ball of fondant into a basic animal shape. For example, for a cow, you might start with a large oval shape for the body, a smaller oval shape for the head, and four small balls for the legs.
Add Details
Once you have your basic shape, it’s time to add some details. Use your fingers or a fondant tool to create texture on the body, such as cow spots or chicken feathers. You can also use small cookie cutters to create shapes for ears, eyes, and other features.
Assemble Your Animal
Once you have all the pieces for your animal, it’s time to assemble them. Use a small amount of edible glue or water to attach the head to the body, and the legs to the body. If you’re making a standing animal, make sure the legs are sturdy enough to support the weight of the body.
Add Finishing Touches
Finally, add any finishing touches to your animal. This might include painting on eyes or adding a little bow around the neck. Be creative and have fun!
Tips for Success
Here are some tips to help ensure your fondant farm animals turn out great:
- Work with small pieces of fondant at a time to prevent it from drying out.
- Dust your work surface and tools with cornstarch or powdered sugar to prevent sticking.
- If you’re having trouble shaping a particular feature, try searching online for tutorials or videos.
- Experiment with different colors and shapes to create unique animals.
- Have patience and take your time – fondant animals can be fiddly to make, but the end result is worth it!
In Conclusion
Making fondant farm animals is a fun and creative way to add a personal touch to your cakes. With a little practice, you’ll be able to create all kinds of cute and whimsical creatures. So why not give it a try and see what kind of farm animals you can come up with?
If you’re planning to create a farm-themed cake, fondant farm animals can be the perfect addition. Not only are they adorable, but they can also add a fun and playful touch to your cake. However, creating these fondant farm animals can be a bit daunting if you’re new to the art of fondant sculpting. But fear not, with a few supplies and some patience, you can create stunning farm animals for your cakes.
First things first, gather all the supplies you’ll need for your fondant farm animals. This will include fondant, food coloring, sculpting tools, toothpicks, and any additional materials for details. Once you have everything you need, choose the farm animal you want to create. Whether it’s a pig, sheep, cow, or horse, make sure to select an animal that inspires you.
Depending on the animal you’re creating, you may need to color your fondant. For example, you may need brown fondant for a horse, pink for a pig, and white for a sheep. Use food coloring sparingly to avoid over saturating the fondant. Now that you have your colored fondant, it’s time to start sculpting.
Begin by sculpting the body of your farm animal. Make sure to create a base that’s proportional to the size of the head and legs. Next, sculpt the head of your farm animal. This is where you can really start adding personality and detail. Create features like ears, eyes, and a nose to make your animal come to life. Toothpicks can be helpful for creating miniature details like whiskers or eyelashes.
Once your animal’s body and head are complete, start adding details like fur, hooves, or tufts of wool. This is where your creativity can shine. Be sure to vary the sizes and features of each animal to make them unique. You can also experiment with different expressions and poses to add even more personality.
To really showcase your fondant farm animals, consider building a farm scene on top of your cake. You could create a barn, fields, or even a farmyard complete with a fence and animals grazing. Once your fondant farm animals are complete, you can display them on top of your cake or in a food-safe display case. You could even turn your creations into cake toppers for future cakes.
Remember, creating fondant farm animals takes practice. Don’t be afraid to keep trying and experimenting until you’ve mastered the art of fondant sculpting. With time and patience, you’ll be able to create increasingly intricate and detailed fondant farm animals that will impress everyone who sees them.
Have you ever wanted to make a cake that featured adorable farm animals? With fondant, you can create charming and realistic-looking characters that will add a touch of whimsy to any cake. Here’s how to make fondant farm animals for cakes:
Materials:
- Fondant in various colors
- Fondant rolling pin
- Fondant sculpting tools
- Small paintbrush and food coloring (optional)
Steps:
- Choose the animal(s) you want to create and gather reference images to help guide your design.
- Take a small amount of fondant and knead it until it is soft and pliable. Roll it into a ball or sausage shape.
- Shape the fondant into the basic form of your animal using your hands and sculpting tools. Use reference images to help you achieve the correct proportions and shapes.
- Add details to your animal using smaller pieces of fondant. For example, use a different color to create spots or stripes, or use a sculpting tool to create texture on fur or feathers.
- Create facial features such as eyes, ears, and noses using small amounts of fondant in different colors. You can also use a small paintbrush and food coloring to add details like pupils or rosy cheeks.
- Let your fondant farm animal dry out for a few hours or overnight before placing it on your cake. This will help it hold its shape and prevent it from smudging or melting.
- Arrange your fondant farm animals on your cake and enjoy!
With a little practice, you can create a whole barnyard of fondant animals that will delight kids and adults alike. Whether you’re making a cake for a birthday party, a baby shower, or just for fun, these fondant farm animals are sure to be a hit!
Well, that brings us to the end of our fondant farm animal journey! I hope you’ve enjoyed learning about how to make these adorable cake toppers as much as I’ve enjoyed sharing my tips and tricks with you. Whether you’re a professional baker or just starting out, creating fondant farm animals is a fun and rewarding way to add personality and charm to any cake.
Remember, the key to success when making fondant farm animals is to take your time and work carefully. Be patient, use good quality ingredients, and don’t be afraid to experiment with different techniques until you find what works best for you. And most importantly, have fun with it!
If you’re looking to take your fondant farm animal skills to the next level, there are plenty of resources out there to help you. From online tutorials and classes to books and magazines, there’s no shortage of inspiration and guidance available. So keep practicing, keep learning, and before you know it, you’ll be creating your own unique and beautiful fondant farm animal designs.
Thanks again for joining me on this fondant farm animal adventure. I hope you’ve found this guide helpful and informative, and I can’t wait to see all the amazing creations you come up with! Happy baking!
.
Are you looking to add a touch of creativity to your cake decorations with fondant farm animals? Look no further! Here are some popular questions people ask about how to make fondant farm animals for cakes:
- What materials do I need to make fondant farm animals?
- Fondant (can be store-bought or homemade)
- Food coloring
- Paintbrushes
- Fondant shaping tools (optional)
- Cornstarch or powdered sugar for dusting and rolling out the fondant
- How do I color the fondant?
- How do I shape the fondant into farm animals?
- How do I attach the fondant animals to the cake?
- How long will the fondant animals last on the cake?
Divide the fondant into small portions and add a few drops of food coloring to each portion. Knead the fondant until the color is evenly distributed. You can mix different colors to create new shades.
Use your hands or fondant shaping tools to mold the fondant into the desired shape. Start with basic shapes and build up from there. For example, for a sheep, start with a ball for the body, add a smaller ball for the head, and then shape legs and ears.
Brush a small amount of water onto the back of the fondant animal and press it gently onto the cake. Alternatively, you can use toothpicks or skewers to secure the fondant to the cake.
Fondant animals can last for several days if stored in an airtight container. However, they may start to dry out and harden over time, so it’s best to add them to the cake as close to serving time as possible.
Now that you have all the information you need, it’s time to get creative and make some adorable fondant farm animals to decorate your cakes!

