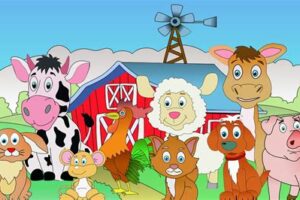
Learn how to create adorable felt farm animals with our step-by-step guide. Perfect for kids and adults alike!
Are you in search of a fun and creative craft project that can also serve as a delightful decoration for your home? Look no further than making felt farm animals! Not only is this project easy to do, but it also allows you to express your creativity and imagination. Additionally, the end result is a set of adorable farm animals that can be used for playtime or as a charming addition to any room.
The Basics of Felt Farm Animal Making: An Introduction
If you’re looking for a fun and creative activity to do at home, making felt farm animals is a great option! Not only is it a relaxing and enjoyable way to pass the time, but it also allows you to create your own cute and cuddly creatures that can be used as decorations or even toys. With a few basic materials and some simple techniques, you’ll be able to make your very own felt farm animals in no time!
Preparing the Materials: How to Choose the Right Colors and Fabrics
Before you start making your felt farm animals, you’ll need to prepare your materials. First, you’ll need to choose the right colors and fabrics. Look for felt sheets in a variety of colors and textures, and choose ones that will work well for the animal you want to create. For example, if you’re making a cow, you might want to choose white and black felt. If you’re making a pig, you might want to choose pink and black felt. You’ll also need some embroidery floss, a needle, and some stuffing.
Sewing Techniques: Mastering the Art of Hand Stitching
When it comes to making felt farm animals, one of the most important skills to learn is hand stitching. This involves using a needle and thread to sew the different pieces of felt together. There are several different types of stitches you can use, including the running stitch, whip stitch, and blanket stitch. Take some time to practice these stitches on a scrap piece of felt before you start making your animal.
Creating the Perfect Patterns: Tips and Tricks for Cutting and Shaping
Once you’ve chosen your colors and fabrics and mastered your sewing techniques, it’s time to create the patterns for your felt farm animal. Start by drawing out the basic shape of your animal on a piece of paper. Then, cut out the different pieces and use them as templates to trace onto your felt. Cut out the felt pieces carefully, making sure to follow the lines of your template. You can also shape the felt by trimming it with scissors or using pinking shears for a more decorative edge.
Assembling the Animal: Putting the Pieces Together
With your felt pieces cut out and shaped, it’s time to start assembling your animal. Begin by sewing together the different body parts using your chosen stitch. Make sure to leave a small opening so you can stuff your animal later. Once you’ve sewn all the pieces together, turn your animal right side out.
Stuffing the Animal: Adding Depth and Dimension
Now it’s time to add some depth and dimension to your felt farm animal. Take some stuffing and carefully fill the body of your animal through the small opening you left earlier. Use your fingers to shape the stuffing and make sure it’s evenly distributed throughout the body. Once you’re happy with the amount of stuffing, sew up the opening.
Adding the Finishing Touches: Eyes, Noses, and Other Facial Features
Your felt farm animal is really starting to take shape now! To give it even more personality, it’s time to add some facial features. Use embroidery floss and a needle to sew on eyes, noses, and other features like whiskers or ears. You can also use buttons, beads, or other accents to decorate your animal.
Decorating the Animal: Adding Details and Accents
To really make your felt farm animal stand out, add some details and accents. You can use additional pieces of felt to create spots, stripes, or other markings on your animal. You can also use embroidery floss to add texture or to create designs like flowers or stars.
Tips for Success: Troubleshooting and Fine Tuning
If you’re having trouble with any part of the felt farm animal making process, don’t be afraid to troubleshoot and fine tune as you go. For example, if your animal is coming out lopsided, try adjusting the stuffing or the placement of the different pieces. If your stitches aren’t holding together, try using a thicker thread or adjusting your tension.
Showcasing Your Creations: Creating a Display or Collection
Once you’ve completed your felt farm animal, it’s time to showcase your creation! You can display your animal on a shelf or in a shadow box, or even create a whole collection of different animals for a fun and whimsical display. With a little creativity and some basic skills, making felt farm animals can be a fun and rewarding activity for anyone.
Are you looking for a fun and creative way to decorate your child’s room? Why not try making some felt farm animals? It’s easy, and with a little creativity, you can create some adorable animals that your child will love.
Materials:
- Felt sheets in various colors
- Scissors
- Glue gun
- Stuffing material
- Black marker
Instructions:
Step 1:
Choose the animal you want to create. For this tutorial, we will create a felt sheep.
Step 2:
Cut two identical sheep body shapes from white felt. Cut out four legs and a head from black felt. Cut out two ears from pink felt.
Step 3:
Using a glue gun, attach two legs to each body shape. Then, attach the head to one of the body shapes.
Step 4:
Using a black marker, draw eyes and a mouth on the sheep’s face.
Step 5:
Stuff the sheep with the stuffing material. Be sure to stuff it enough so that it keeps its shape.
Step 6:
Using the glue gun, attach the second body shape to the first, sandwiching the stuffing inside.
Step 7:
Attach the ears to the head using the glue gun.
Step 8:
Your felt sheep is now complete! Repeat steps 1-7 to create other farm animals.
Creating felt farm animals is a fun and creative project that both kids and adults can enjoy. Use your imagination to create a whole barnyard full of animals that your child will love.
Thank you for visiting my blog and taking the time to learn how to make felt farm animals. I hope this tutorial has inspired you to tap into your creative side and create your own little farm animal family. Making felt farm animals is not only a fun activity, but it is also a great way to spend quality time with your children or friends.
If you are new to felting, don’t be intimidated! Felting is an easy craft that requires minimal supplies and can be done by anyone. All you need is some wool roving, felting needles, and a foam pad. Once you have these supplies, you are ready to start creating your own felt farm animals.
Remember, the key to making felt farm animals is to take your time and have fun. Don’t worry about making them perfect – imperfections add character and charm to your creations. You can also customize your animals by using different colors of wool roving or adding embellishments like beads or ribbons. The possibilities are endless!
In conclusion, making felt farm animals is a wonderful way to express your creativity and make something adorable. Whether you are making these animals as a gift or for yourself, they are sure to bring a smile to anyone’s face. So grab your supplies, get cozy, and start creating your very own felt farm animal family. Happy felting!
.
As a virtual assistant, I do not have personal experiences but I can provide you with information that can help you with your query on how to make felt farm animals. Here are some of the frequently asked questions:
-
What materials do I need to make felt farm animals?
Answer: You will need felt fabric, scissors, thread and needle, glue, stuffing material, and colored markers.
-
How do I create the pattern for my felt farm animal?
Answer: You can either search for a template online or create your own by drawing it on a piece of paper then cutting it out. You can also trace it onto your felt fabric.
-
What is the best way to cut the felt fabric?
Answer: It is recommended to use sharp scissors and to cut slowly and carefully to avoid frayed edges.
-
Should I sew or glue the felt farm animal?
Answer: It depends on your preference and the design of your animal. Sewing is more durable but gluing is easier and quicker.
-
How do I stuff my felt farm animal?
Answer: You can use polyester stuffing or cotton balls. Make sure to stuff it firmly but not too much to avoid distorting the shape of your animal.
-
How can I add details to my felt farm animal?
Answer: You can use colored markers or paint to add eyes, nose, and other features. You can also use embroidery thread for a more intricate design.
-
What are some tips for making felt farm animals?
Answer: Make sure to have a clean and organized workspace, use high-quality materials, and take your time to avoid mistakes. You can also watch video tutorials or read step-by-step guides for more guidance.
With these tips and information, you can now start making your own felt farm animals and unleash your creativity!

