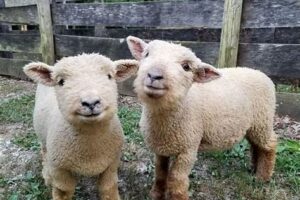
Learn how to make adorable paper mache farm animals with this easy-to-follow tutorial. Perfect for kids and adults alike!
Are you looking for a fun and creative way to decorate your home or classroom? Look no further than making paper mache farm animals! Not only is this a budget-friendly craft, but it also allows for endless customization options. First, gather your materials such as newspaper, flour, water, and paint. Then, decide which farm animal you want to create. Will it be a fluffy sheep or a spotted cow? Once you have your idea in mind, start shaping your base with crumpled newspaper and masking tape. Next, mix together your flour and water to create a paste to cover your animal. Don’t forget to add details like ears, snouts, and hooves using cardboard or more newspaper. Finally, let your creation dry completely before painting with bright colors and patterns. Your paper mache farm animals are sure to be a hit with kids and adults alike!
Paper mache is a fun and easy way to create beautiful and unique crafts. It’s also very versatile, allowing you to make anything from bowls to masks to sculptures. In this article, we’ll show you how to make paper mache farm animals.
MaterialsBefore we get started, let’s go over the materials you’ll need:- Flour- Water- Newspaper- Balloons- Paint- Brushes- Scissors
Step 1: Blow up the BalloonThe first step is to blow up your balloon. This will be the base for your animal. You can make a big balloon for a large animal or a small one for a smaller animal.
Step 2: Mix Flour and WaterNext, mix some flour and water together to create the paper mache paste. The ratio should be about one part flour to two parts water. Mix it until it’s smooth and there are no lumps.
Step 3: Tear Newspaper StripsTear some newspaper into long strips. You’ll need a lot of them, so tear up a whole newspaper or two.
Step 4: Dip Strips in PasteDip each strip of newspaper into the paste, making sure it’s completely coated. Then, run the strip between your fingers to remove any excess paste.
Step 5: Cover Balloon with Newspaper StripsStart covering your balloon with the newspaper strips. Make sure each strip is smooth and there are no air bubbles. Continue until the entire balloon is covered.
Step 6: Let Dry OvernightOnce you’ve covered your balloon, let it dry overnight. This will give the paper mache time to harden and become sturdy.
Step 7: Paint Base CoatOnce your paper mache animal is dry, it’s time to paint! Start with a base coat of paint, using a light color like white or cream.
Step 8: Add DetailsNext, add some details to your animal. Use a darker color to paint eyes, nostrils, and any other features your animal might have.
Step 9: Let DryLet the paint dry completely before handling your paper mache animal.
Step 10: Display Your CreationCongratulations, you’ve made your own paper mache farm animal! Display it proudly in your home or give it as a unique and thoughtful gift.Gathering Supplies: The Essentials You Need for Paper Mache Farm AnimalsBefore you start your paper mache farm animal project, it’s important to gather all the necessary tools and supplies. You will need paper mache mix, water, newspaper, a balloon or foam structure, paints, and brushes. These items can usually be found at your local craft store or online. Make sure you have enough supplies to complete your animal, as you don’t want to run out in the middle of the project. Once you have everything you need, you can begin the fun process of creating your very own farm animal!Choosing Your Animal: Get Inspired and Pick a Farm Animal to RecreateNow that you have your supplies, it’s time to choose which farm animal you want to recreate. This is the fun part! Take some time to get inspired and think about which animal means something to you or brings back fond memories. Maybe you love cows and remember visiting a farm as a child. Or perhaps you have a pet chicken at home that you want to immortalize in paper mache. Let your imagination guide you and choose an animal that you feel passionate about.Making the Base: Create the Foundation for Your AnimalOnce you have chosen your animal, it’s time to create the base using newspaper and a balloon or foam structure. The size and shape of your base will depend on the animal you have chosen to make. For example, a chicken will require a round shape for the body and a narrower shape for the neck. Use newspaper to create the desired shape and secure it with tape. Then, use a balloon or foam structure to create the head and limbs. Make sure everything is securely attached before moving on to the next step.Mix the Paper Mache Mix: Creating the Glue for Your CreationNow it’s time to mix the paper mache mix with water according to the instructions on the package. Stir until the consistency is smooth and not too thick. You may need to add extra water or paper mache mix to get the right consistency. Once you have the mix ready, it’s time to start applying it to the base of your animal.Apply Layers: Layering the Paper Mache for DurabilityDip strips of newspaper into the paper mache mix until they are fully coated. Apply the strips to the base of your animal, making sure to smooth out any bumps or creases. Apply several layers for durability. Allow each layer to dry before adding the next. You will need to apply at least three to four layers of paper mache to ensure that your animal is sturdy and durable.Detailing: Adding Your Animal’s Eyes, Beak or SnoutOnce the paper mache is dry, you can start highlighting the details of your animal. Paint your animal’s eyes and add a beak or snout if needed. You can also add ears, spots, feathers, or fur using paper mache or other materials such as fabric or feathers. This is where your creativity can really shine, so take your time and make your animal look as realistic or whimsical as you like.Color Palette: Choosing Inspired Colors for Your Farm AnimalChoosing the right color palette is important to make your animal look authentic and beautiful. Cows can be painted black and white, pigs can be pink, and chickens can be yellow. Use your imagination and create something unique and memorable. Don’t be afraid to experiment with different colors and patterns until you find the perfect combination.Adding Texture: Creating Dimension with Paper MacheUse a small brush to add texture to your animal. You can create a furry effect with short brush strokes or add roughness to the skin with longer strokes. This will give your animal dimension and make it look more realistic. Take your time and experiment with different textures until you achieve the desired effect.Adding Accessories: Personalizing Your Paper Mache Farm AnimalTo add a personal touch to your animal, consider creating accessories such as a collar, a hat, or a scarf. This will give your animal character and make it unique to you. Use materials such as fabric, ribbon, or beads to create these accessories and attach them securely to your animal.Show It Off: Displaying Your Paper Mache Farm AnimalNow that your animal is complete, it’s time to show it off! Display it in your home or garden, or give it as a gift to someone special. You can also use it as a centerpiece for a farm-themed party or event. Be proud of your creation and enjoy the satisfaction of knowing that you made something beautiful and unique with your own two hands.
Are you looking for a fun and creative activity to do with your kids or just something to do on a lazy afternoon? Making paper mache farm animals can be a great way to spend some quality time together and create something unique.
Materials Needed:
- Newspaper or old magazines
- Water
- All-purpose flour
- Salt
- Balloons
- Paint and paintbrushes
- Glue
- Scissors
Instructions:
- Blow up your balloons to the desired size for your animals. You can make cows, pigs, horses, and many other animals.
- Next, tear the newspaper or magazines into small strips.
- In a large bowl, mix one part flour to two parts water. Add a pinch of salt to prevent molding. Mix well to create a smooth paste.
- Dip the newspaper strips into the paste, making sure to remove any excess paste by running the strips between your fingers.
- Cover the balloon with the newspaper strips, making sure to overlap each strip to create a sturdy base. Cover the balloon completely, leaving a small opening at the bottom. This will be used to remove the balloon once the paper mache has dried.
- Allow the paper mache to dry completely, which may take a few hours or overnight.
- Once the paper mache is completely dry, carefully use scissors to cut a small hole at the top of the animal. This will be used to stuff the inside of the animal with more paper mache or cotton balls.
- Once you’ve filled the animal, cover up the hole with more paper mache and allow it to dry again.
- Now it’s time to paint your animal! Use your creativity to make it look like a cow, pig, or horse. You can also add details like spots or stripes.
- Finally, glue on any additional features like eyes or ears.
Making paper mache farm animals is a fun and creative activity for all ages. So gather your materials and let the fun begin!
Thank you for visiting and reading this article on how to make paper mache farm animals! I hope that you found the information helpful and that it inspires you to create your own unique animal creations. Paper mache is a fun and inexpensive craft that can be enjoyed by people of all ages, and creating farm animals is a great way to incorporate a rustic and charming touch to your home decor or children’s playtime.
As mentioned in the article, the process of making paper mache farm animals involves a few basic steps: creating the armature, applying layers of paper and glue, and then painting and decorating the finished product. While it may seem daunting at first, with some patience and practice, anyone can master this craft and create beautiful works of art.
One of the best things about paper mache is that it allows for endless creativity and customization. Whether you want to make a realistic replica of your favorite farm animal or a whimsical, cartoon-inspired creature, the possibilities are truly endless. Don’t be afraid to experiment with different shapes, colors, and textures to create something truly unique and special.
In conclusion, I hope that this article has inspired you to try your hand at making paper mache farm animals. Not only is it a fun and rewarding craft, but it also allows you to tap into your creativity and imagination. So gather your supplies, put on some music, and get ready to create something amazing! Happy crafting!
.
When it comes to making paper mache farm animals, people often have many questions. Here are some of the most common people also ask queries:
- What materials do I need to make paper mache farm animals?
- How do I make the paper mache paste?
- What is the best way to form the animal’s body shape?
- How do I add details like eyes and fur?
- How long does it take for the paper mache to dry?
Let’s address these questions one by one:
- What materials do I need to make paper mache farm animals?
- How do I make the paper mache paste?
- What is the best way to form the animal’s body shape?
- How do I add details like eyes and fur?
- How long does it take for the paper mache to dry?
You will need newspaper, flour, water, a paintbrush, acrylic paint, scissors, and any additional materials you want to use for details.
Mix one part flour with two parts water in a bowl until the mixture is smooth. You may need to adjust the consistency by adding more flour or water as needed.
You can use crumpled up newspaper to create the basic shape of your animal. Then, use masking tape to secure the newspaper in place and add more layers of paper mache on top until you achieve the desired thickness.
You can use additional pieces of newspaper or other materials like pipe cleaners or pom poms to add details to your animal. Use acrylic paint to add color and texture to your creation.
Drying time can vary depending on the thickness of your paper mache layers and the humidity in your environment. It may take anywhere from a few hours to a few days for your creation to fully dry.
With these tips in mind, you can create your very own paper mache farm animals that are sure to impress!

