Creating Adorable Farm Animal Cutouts: A Step-By-Step Guide for Craft Enthusiasts!

How To Make Farm Animal Cutouts

Learn how to make farm animal cutouts with ease! Follow our step-by-step guide and create fun DIY decorations for your next party or event.

Are you looking for a fun and easy craft project that your kids will love? Why not try making farm animal cutouts! Not only is this activity perfect for keeping little ones entertained, but it also allows them to use their imagination and creativity. In this guide, we’ll show you how to make farm animal cutouts step-by-step, using simple materials that you probably already have at home. By the end of this tutorial, you’ll have some adorable farm animal cutouts that you can display in your home or use for a variety of DIY projects.

Farm
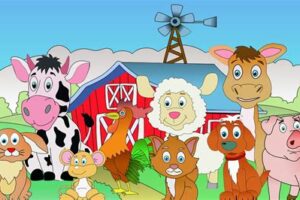
Are you looking for a fun and creative way to decorate your home or classroom? Making farm animal cutouts is the perfect activity for anyone who loves animals and wants to add some charm to their space. In this article, we will guide you through the process of making these adorable cutouts step by step.Materials NeededTo make farm animal cutouts, you will need the following materials:- Colored construction paper- Scissors- Glue- Pencil- Black marker- RulerStep 1: Choose Your Farm AnimalsThe first thing you need to do is choose which farm animals you want to create. You can choose from a variety of animals such as cows, horses, chickens, pigs, and sheep. Think about what colors you want to use and the size of the cutouts.Step 2: Draw Your Farm AnimalsUsing a pencil, draw the outline of your farm animals on the colored construction paper. You can find templates online if you need inspiration. Make sure to draw all the details such as the eyes, nose, ears, and tail.
Cow
Step 3: Cut Out Your Farm AnimalsUsing scissors, carefully cut out your farm animals along the lines you drew. Take your time to make sure the edges are smooth and clean.Step 4: Add DetailsUsing a black marker, add details to your farm animals such as spots on cows, stripes on zebras, or feathers on chickens. This will make your cutouts look more realistic and fun.
Pig
Step 5: Create GrassTo add some texture to your cutouts, create grass by cutting thin strips of green construction paper. Glue the strips to the bottom of your farm animals to create a grassy field.Step 6: Arrange Your Farm AnimalsNow it’s time to arrange your farm animals in a way that looks appealing to you. You can create a scene with multiple animals or display them separately.Step 7: Add a BackgroundTo make your farm animal cutouts stand out, create a background by gluing them onto a larger piece of construction paper. You can also use a poster board for a sturdier base.
Farm
Step 8: Display Your CutoutsOnce you have finished creating your farm animal cutouts, it’s time to display them. You can hang them on a wall, attach them to a bulletin board, or prop them up on a shelf.Step 9: Use Them as Learning ToolsFarm animal cutouts are not only decorative but can also be used as learning tools. They are perfect for teaching children about different animals, their habitats, and their characteristics.
Classroom
Step 10: Have FunThe most important step of all is to have fun! Making farm animal cutouts is a great way to express your creativity and spend time with loved ones. So put on some music, grab some snacks, and enjoy the process of creating these adorable cutouts.Making farm animal cutouts is a fun and creative activity that can be enjoyed by both kids and adults. To get started, gather all necessary materials such as paper, scissors, glue, and markers. Once you have your materials ready, choose which farm animal you want to create a cutout of. There are countless options to choose from, including cows, pigs, chickens, and more! To ensure your cutout is accurate and recognizable, look up reference images of your chosen farm animal. Next, using a pencil, lightly sketch the outline of your farm animal onto the paper. Be sure to include any distinct features or details that make your chosen animal unique. Once you have sketched your outline, carefully cut out the shape using scissors. Now it’s time to add some details to your farm animal cutout. Using markers or colored pencils, add any additional details such as spots, stripes, or facial features. Get creative and experiment with different colors and patterns to make your cutout unique. To make your farm animal cutout stand, fold a piece of paper in half and cut out a rectangular shape. Fold the rectangle in half again, then glue each half of the rectangle to the back of your farm animal cutout. This will create a stand that allows your cutout to stand upright on its own. Once your farm animal cutout is complete, find a place to display it! Show it off on a table, shelf, or even in a collage with other farm animal cutouts. If you’re feeling adventurous, try experimenting with different materials such as felt or foam sheets. The most important part of creating farm animal cutouts is to have fun! Let your creativity flow and enjoy the process of bringing your favorite farm animals to life.

Have you ever wanted to add a fun and creative touch to your farm-themed party or decorate your child’s room with cute farm animal cutouts? Well, look no further! Making farm animal cutouts is a simple and enjoyable DIY project that you can easily do at home. Here’s how:

Materials Needed:

  • Cardstock paper
  • Pencil
  • Scissors
  • Glue stick
  • Paint or markers (optional)

Step-by-Step Instructions:

  1. Choose the farm animals you want to make cutouts of. This could include cows, pigs, chickens, horses, and more.
  2. Using a pencil, draw the outline of the animal on the cardstock paper. You can find templates online or draw the shapes freehand.
  3. Carefully cut out the animal shape using scissors. Be sure to make clean cuts and follow the lines as closely as possible.
  4. Using a glue stick, apply glue to the back of the cutout animal and attach it to another piece of cardstock paper. This will create a sturdier cutout that can stand on its own.
  5. If desired, use paint or markers to add details and color to the animal cutout. This can include spots, stripes, eyes, and more.
  6. Repeat steps 2-5 for each animal you want to make a cutout of.
  7. Once all the animals are complete, you can display them on a table, hang them as decorations, or even use them as props in a play or puppet show!

Overall, making farm animal cutouts is a fun and creative way to add a personal touch to your home or event. The possibilities are endless, so let your imagination run wild!

Thank you for joining me in this fun and creative journey of making farm animal cutouts! I hope this article has inspired you to try your hand at creating your own set of farm animals. Whether you’re a teacher looking for an engaging activity for your students or a parent trying to find a fun project to do with your kids, this is a great option that is sure to bring a smile to everyone’s faces.

As we’ve learned, making farm animal cutouts is a simple and enjoyable process that requires just a few basic materials. By following the steps outlined in this article, you can create a set of colorful and realistic farm animals that will be perfect for decorating your classroom, home, or office. And the best part is that you can customize them however you like, adding your own unique flair to each one.

So go ahead and give it a try! Get creative with your designs and colors, and don’t be afraid to experiment with different materials. Whether you choose to use paper, cardboard, or foam, the possibilities are endless. And who knows? You might just discover a new hobby that you love.

Thank you again for reading, and I hope you enjoyed learning how to make farm animal cutouts. If you have any questions or feedback, please feel free to leave a comment below. And if you end up making your own set of farm animals, I’d love to see pictures! Happy crafting!

.

People also ask about how to make farm animal cutouts. Here are some answers:

  • What materials do I need to make farm animal cutouts?
    • You will need colored paper or cardstock, scissors, glue, and a pencil.
  • What farm animal cutouts can I make?
    • You can make a cow, pig, sheep, horse, chicken, and more!
  • How do I make a farm animal cutout?
    • First, choose the farm animal you want to make. Then, draw the animal outline on the colored paper or cardstock using a pencil. Cut out the animal shape using scissors. Add details such as eyes, nose, mouth, and spots using a different colored paper or cardstock. Finally, glue the details onto the animal cutout.
  • Can I use templates to make farm animal cutouts?
    • Yes, you can find many templates online and print them out to make your farm animal cutouts.
  • What can I do with my farm animal cutouts?
    • You can use them to decorate your room, create a farm scene, or use them as props for a school play or presentation.

With these simple steps, you can create your own farm animal cutouts using your creativity and imagination.

Recommended For You

Leave a Reply

Your email address will not be published. Required fields are marked *